User-Centred Design: Creating Experiences that Delight Users

Introduction

In today’s digital landscape, where user satisfaction and engagement are paramount, businesses are increasingly focusing on user-centred design. This approach places the user at the heart of the design process, ensuring that products and services are intuitive, accessible, and enjoyable to use. In this article, we will explore the principles of user-centred design, its benefits, and how it can be implemented to create exceptional user experiences.

Article: User-Centered Design: Creating Experiences that Delight Users

Welcome to the world of user-centred design! In this digital era, where user satisfaction is paramount, businesses are increasingly realizing the importance of creating delightful experiences for their users. Gone are the days when products were developed without considering the needs and preferences of the end-users. User-centred design brings the user to the forefront, ensuring that every aspect of a product or service is tailored to meet their expectations and needs.

User-centred design involves a deep understanding of users through research, analysis, and continuous feedback. By gaining insights into their behaviours, motivations, and pain points, designers can create solutions that not only meet their needs but also exceed their expectations. It’s like designing a comfortable and intuitive path for users to navigate through a digital landscape.

The Benefits of User-Centered Design

The benefits of user-centred design are numerous. Firstly, it leads to improved user satisfaction. When users find a product or service easy to use, efficient, and enjoyable, they are more likely to engage with it and become loyal customers. This, in turn, leads to increased conversions, higher retention rates, and positive word-of-mouth recommendations.

Secondly, the user-centred design reduces development costs and time. By involving users early in the design process, potential usability issues and design flaws can be identified and addressed promptly, saving resources that would otherwise be spent on fixing problems after launch. Moreover, iterating and testing throughout the design process ensures that the final product meets user expectations.

Understanding User Needs: Research and Analysis

Before diving into design, it’s crucial to gain a deep understanding of your target users. This involves conducting user interviews, observing user behaviour, and analyzing user feedback. User interviews provide valuable insights into their goals, preferences, and pain points. Observing user behaviour helps identify patterns, allowing designers to create solutions that align with users’ mental models. Analyzing user feedback, such as surveys or user testing sessions, helps identify areas of improvement and refine the design.

Creating Personas: Putting Users First

Personas are fictional representations of your target users based on the insights gathered from research. They embody the characteristics, goals, and behaviours of real users, helping designers empathize and design for their specific needs. Personas act as a guiding light throughout the design process, ensuring that every decision made aligns with the user’s goals and motivations.

Ideation and Conceptualization: From Ideas to Solutions

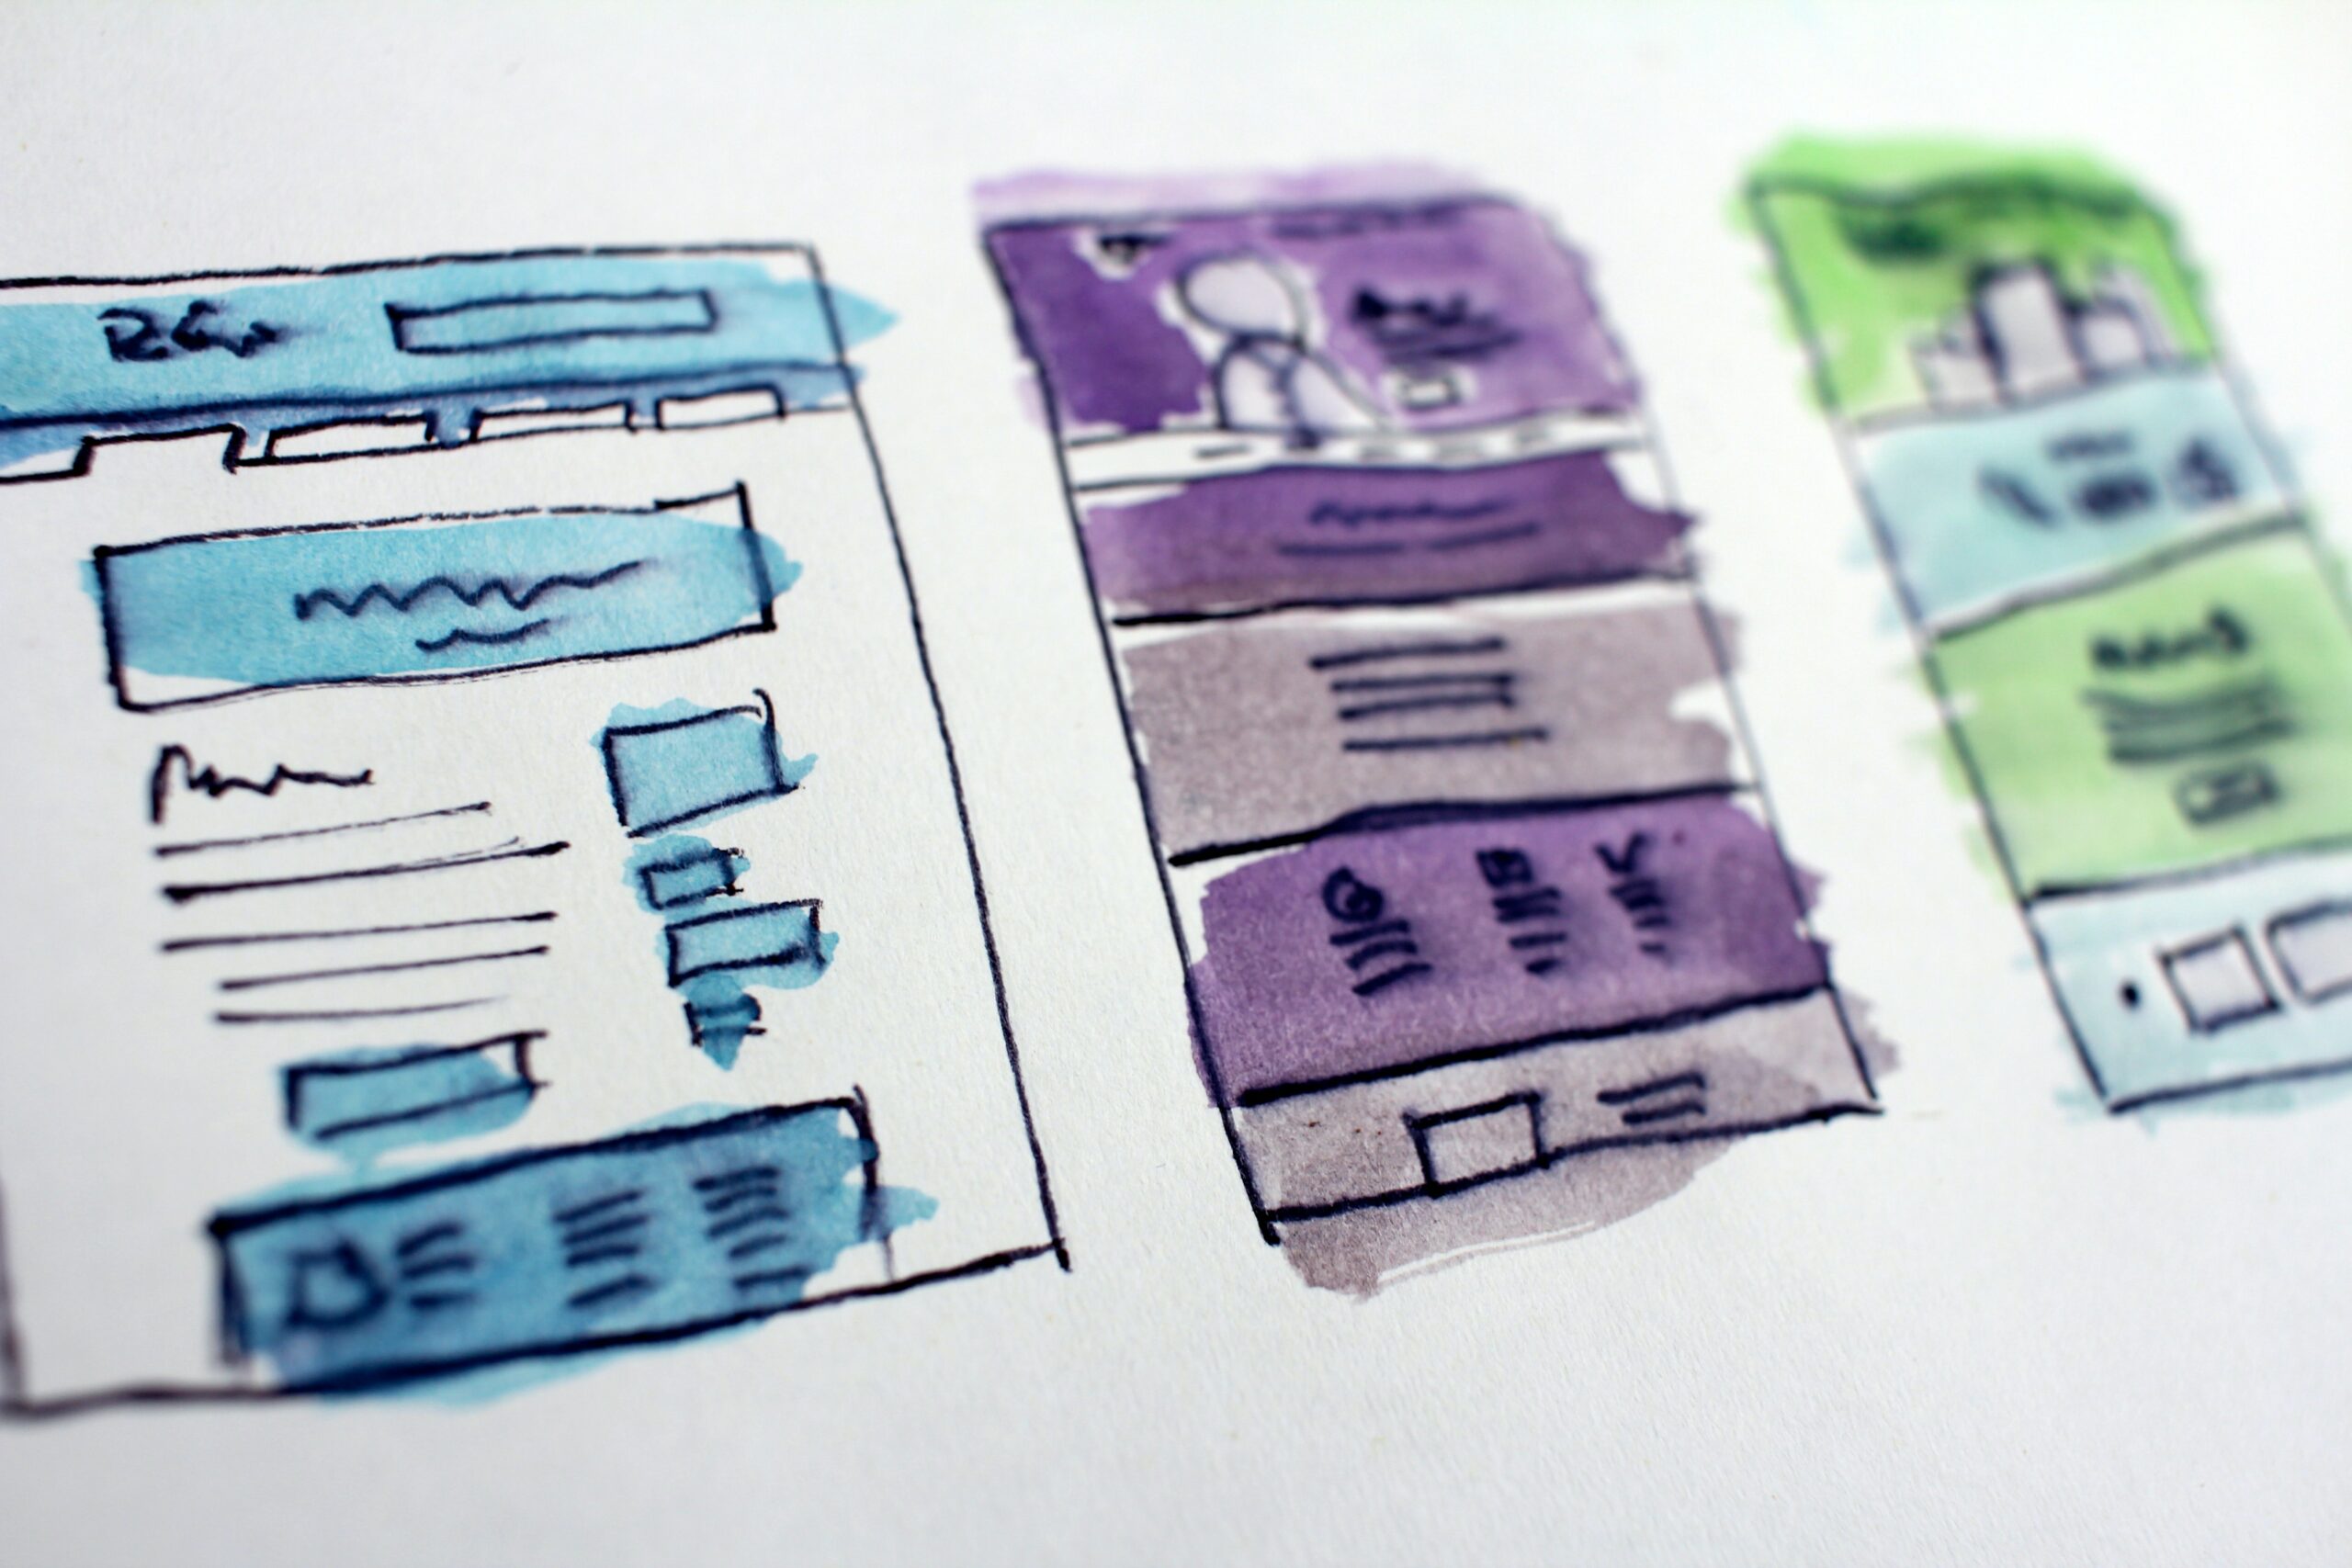
Once armed with user insights and personas, the ideation and conceptualization phase begins. This is where creativity and innovation come into play. Brainstorming sessions allow designers to explore a wide range of ideas and possibilities. Sketching and wireframing help visualize these ideas, enabling rapid iteration and feedback. Prototyping and testing with users bring ideas to life, providing invaluable feedback that drives further improvements.

Iterative Design: Continuous Improvement

User-centred design is an iterative process. It involves gathering user feedback, incorporating iterations, and conducting usability testing at each stage. This continuous improvement cycle ensures that the design is refined and optimized based on real user experiences. By involving users throughout the design process, designers can build products and services that truly resonate with their needs.

Accessibility: Designing for All Users

Inclusive design is a core principle of user-centred design. It involves creating products and services that are accessible to users with disabilities and diverse needs. By considering accessibility from the early stages of design, designers can ensure that everyone can use and benefit from their creations. This not only improves the user experience but also helps businesses comply with accessibility regulations and reach a broader audience.

Visual and Interaction Design: Crafting Engaging Experiences

Visual and interaction design plays a crucial role in creating engaging user experiences. Typography, colour palettes, visual hierarchy, and consistency all contribute to the aesthetics and usability of a product. Intuitive navigation and interactions guide users seamlessly through the interface, reducing friction and enhancing engagement. Remember, design is not just how it looks; it’s also about how it works.

Evaluation and Metrics: Measuring Success

To gauge the success of a design, it’s essential to establish metrics and evaluate its performance. A/B testing allows designers to compare different design variations and identify the most effective ones. Heatmaps and user analytics provide insights into user behaviour and interactions, helping refine the design further. Conversion rates and user satisfaction surveys offer quantifiable measures of success and user happiness.

Collaboration and Communication: Multidisciplinary Teams

User-centred design thrives in a collaborative environment. It requires multidisciplinary teams working together to bring ideas to life. UX designers, developers, stakeholders, and other team members all contribute their expertise to create exceptional user experiences. Design sprints and workshops foster creativity, align goals, and ensure a smooth collaboration process. Clear and effective communication is crucial to maintain a shared understanding and keep everyone on the same page.

Challenges and Considerations in User-Centered Design

While user-centred design brings tremendous benefits, it also presents challenges. Balancing user needs with business goals can be tricky, requiring trade-offs and prioritization. Addressing technical limitations and working within constraints demand creative problem-solving. Additionally, user expectations evolve over time, necessitating ongoing research and adaptation to stay ahead.

Future Trends in User-Centered Design

The field of user-centred design is constantly evolving. As technology advances, new trends emerge. Artificial intelligence and personalization allow for tailored experiences that adapt to individual user preferences. Voice user interfaces (VUI) offer hands-free and natural interactions. Augmented reality (AR) and virtual reality (VR) open up new possibilities for immersive user experiences.

Conclusion

User-centred design is a powerful approach that places users at the heart of the design process. By understanding their needs, creating personas, ideating, iterating, and incorporating feedback, designers can create exceptional user experiences that delight and engage. Remember, it’s not just about aesthetics or functionality; it’s about crafting experiences that truly resonate with users, making their journey seamless, intuitive, and enjoyable.

Frequently Asked Questions (FAQs)

1. How does user-centred design differ from other design approaches?

User-centered design focuses on understanding and meeting the needs of users throughout the design process. It involves research, analysis, and continuous iteration based on user feedback. Other design approaches may prioritize aesthetics, functionality, or business goals without placing as much emphasis on user satisfaction and engagement.

2. What are the key benefits of user-centred design?

User-centred design leads to improved user satisfaction, increased conversions, higher retention rates, and positive word-of-mouth recommendations. It also reduces development costs and time by addressing usability issues early in the design process.

3. How can user-centred design be implemented in an organization?

Implementing user-centred design requires a commitment to user research, collaboration among multidisciplinary teams, and a willingness to iterate and improve based on user feedback. It’s essential to embed user-centred design principles into the organization’s culture and processes.

4. What role does accessibility play in user-centred design?

Accessibility is a vital aspect of user-centred design. By designing for all users, including those with disabilities, designers ensure inclusivity and reach a broader audience. It also helps businesses comply with accessibility regulations and ethical considerations.

5. What are some future trends in user-centred design?

Future trends in user-centred design include artificial intelligence and personalization, voice user interfaces (VUI), augmented reality (AR) and virtual reality (VR). These technologies offer exciting opportunities to create more tailored and immersive user experiences.


Laravel Best Practices and Standards Guide

Laravel! Ever heard of it? I bet you have if you’re a part of the web development world. But what makes Laravel so special? What are the Best Laravel Practices and Standards you follow to make your Laravel-based application efficient, maintainable, and simply superior?

That’s precisely what we’re about to delve into. So buckle up; it’s going to be an enlightening ride!

Introduction

Importance of Coding Standards

Remember when you picked up your first Lego set and followed the guide to create the picture-perfect castle on the box? Similarly, coding standards are like a guide to creating efficient and maintainable code. They help ensure that your code is clean, readable, and beautiful to look at (yes, code can be beautiful!), so welcome to our comprehensive guide on the Best Laravel Practices and Standards.

Brief Introduction to Laravel

Enter Laravel, a free, open-source PHP web framework intended for the development of web applications. Laravel offers a beautiful syntax that can make web development a joy. It eases tasks such as routing, authentication, sessions, caching, and more, which makes it a preferred choice among developers.

Understanding Laravel

History and Evolution

Created by Taylor Otwell in 2011, Laravel has come a long way. It’s not just a tool but a whole ecosystem for developing modern web applications. With every new version, Laravel has introduced features to make web development more effortless.

Why Choose Laravel?

You may ask, “Why Laravel?” The answer lies in its simplicity and elegance. It is user-friendly, easy to understand, and offers robust features that make it a comprehensive platform for developers. Laravel also follows MVC (Model-View-Controller), an architectural pattern that separates an application into three main logical components.

Understanding Laravel Architecture

The MVC pattern is what gives Laravel its power. Models correspond to your database structure, Views represent your user interface, and Controllers are the bridge connecting them. Laravel’s service container, a powerful tool for managing class dependencies, is at the heart of Laravel’s architecture.

The Laravel Framework

Installation & Setup

Starting with Laravel is like a breeze. With Composer, Laravel can be installed and set up in a few minutes. Just ensure you meet the server requirements before you dive in.

The Structure of Laravel

Laravel follows a well-defined directory structure. It’s clean and organised, and you will know where to find what.

Understanding MVC in Laravel

In Laravel, the MVC pattern makes it easier to manage complexity by separating the application logic from the user interface.

Best Practices in Laravel

Let’s delve into the Best Laravel Practices and Standards that will make your Laravel-based application efficient, maintainable, and superior.

Using Eloquent ORM

One of the star features of Laravel is Eloquent ORM. It’s an advanced PHP implementation of the active record pattern that allows you to interact with your database like you would with SQL.

Applying SOLID Principles

Remember the SOLID principles? They are the five principles of Object-Oriented Design that promote more understandable, flexible, and maintainable code. When you apply these principles to your Laravel project, you’ll see how they elevate your coding game.

Keeping Controllers Thin

The saying “Fat models, skinny controllers” is popular in the Laravel community. This principle states that the bulk of your logic should be in the model, while the controller should handle only the request and response.

Organising Routes

Routes are the heart of your Laravel application. Organising them in a way that reflects the application structure and is easy to understand is a best practice you shouldn’t overlook.

Writing Efficient Laravel Code

Using Artisan Commands

Artisan is Laravel’s command-line interface. It includes several commands that assist you while you build your application. It’s like having your personal assistant!

Using Laravel’s Blade Templating Engine

Blade is Laravel’s simple yet powerful templating engine. Unlike other PHP templating engines, Blade does not restrict you from using plain PHP code in your views.

Dependency Injection and Service Containers

Dependency Injection is a design pattern that allows for IoC (Inversion of Control). Laravel’s service container is a powerful tool for managing class dependencies and performing dependency injection.

Testing in Laravel

Unit Testing

Unit tests focus on a small piece of code. Laravel is built with testing in mind and comes with PHPUnit integrated.

Feature Testing

Feature tests ensure that your application’s larger portions of code are working correctly.

Using PHP Unit in Laravel

Laravel’s integration with PHPUnit makes it easy to run tests for your application and ensure it behaves as expected.

Laravel Packages and Libraries

Using Composer

Composer is a tool for dependency management in PHP. Laravel utilises Composer to manage its dependencies and to ensure the right versions of packages are being used.

Useful Laravel Packages

Laravel has a rich ecosystem of packages that can significantly boost your productivity. Some of them are Laravel Debugbar, Laravel IDE Helper, Laravel Telescope, and many more.

Conclusion

This comprehensive guide provides you with a deep understanding of Laravel and the Best Laravel Practices and Standards that will help you write efficient, maintainable, and superior code. Laravel, with its elegant syntax and robust features, has indeed changed the landscape of web development. Whether you’re a beginner or an expert, Laravel has something in store for you. Embrace these practices and see your web development journey reach new heights!

FAQs

  1. What is Laravel used for?
    • Laravel is a web application framework with an expressive, elegant syntax aimed at making web development tasks, such as routing, persistence, queuing, caching, and security, easier for developers.
  2. Why is Laravel so popular?
    • Laravel is popular due to its robust features and ease of use. It’s a complete and developer-friendly framework that speeds up the web development process.
  3. What databases does Laravel support?
    • Laravel supports a variety of databases, including MySQL, Postgres, SQLite, and SQL Server.
  4. Is Laravel suitable for large-scale applications?
    • Absolutely! Laravel is excellent for large-scale applications due to its efficiency, security features, and scalability.
  5. How secure is Laravel?
    • Laravel takes security seriously and provides several built-in mechanisms to protect your application. It handles many security aspects, like protection from SQL injection, cross-site request forgery, and cross-site scripting.

User Personas: Understanding Your Users for Better UX Design

Photo by Hal Gatewood on Unsplash

Introduction

In user experience (UX) design, understanding the needs, behaviours, and motivations of users is crucial for creating effective and engaging products or services. One of the most effective tools for achieving this understanding is the user persona. A user persona is a fictional representation of a specific user group, based on research and data analysis. Personas help designers and developers empathize with users, identify their goals and pain points, and make informed design decisions. In this article, we’ll discuss what makes a good persona, the components of a persona, and how to create and use personas effectively, with a focus on practical tips for uni students. Whether you’re new to UX design or an experienced professional, this guide will help you to create user personas that accurately reflect your target audience and improve the overall user experience.

Photo by Kelly Sikkema on Unsplash

What Makes a Good Persona?

User personas are fictional representations of your ideal customers, based on research and data about your target audience. They help you understand your users’ needs, motivations, and behaviours, which in turn helps you design products that meet their specific needs and preferences.

An example

There are many ways to create user personas, but they typically consist of a few key components, such as demographic information, goals, pain points, and behaviours. Here’s an example of a simple persona for a fitness app:

Name: Jane Age: 35

Occupation: Marketing Manager

Goals: Lose 10 pounds, improve energy levels

Pain points: Busy work schedule, dislike of traditional gym settings

Behaviours: Prefers outdoor exercise, uses fitness tracking apps

Characteristics of Good Personas

To create effective personas, it’s important to keep the following characteristics in mind:

  1. Based on research and data – Personas should be based on real data about your target audience, such as user surveys, interviews, or analytics.
  2. Focused on goals and behaviours – Personas should be focused on your users’ goals, needs, and behaviours, rather than their demographic information alone.
  3. Concise and memorable – Personas should be easy to understand and remember so that they can be easily shared and used by your team.
  4. Representative of your target audience – Personas should be representative of your target audience as a whole, rather than outliers or extremes.

Common Mistakes to Avoid

There are a few common mistakes that people make when creating personas, such as:

  1. Creating personas based on assumptions or stereotypes – Personas should be based on real data, rather than assumptions or stereotypes about your users.
  2. Creating personas without proper research – Personas should be based on real research and data about your users, rather than guesswork or assumptions.
  3. Making personas too general or unrealistic – Personas should be specific and realistic so that they can be used effectively to guide product development.
  4. Neglecting to update or refine personas over time – Personas should be updated and refined over time, based on new data and feedback from your users.

Importance of Accurate and Realistic Personas

Creating accurate and realistic personas is essential for product development, as it helps you understand your users’ needs, behaviours, and preferences. This, in turn, helps you design products that meet their specific needs, which can lead to improved user experience, increased efficiency, and reduced costs.

Components of a Persona

To create a successful persona, it’s important to understand the key components that make up a persona. These components include who the user is, their goals and objectives, the barriers preventing them from achieving those goals, and their pain points and needs.

Who They Are

The first component of a persona is identifying who the user is. This includes basic demographic information such as age, gender, education level, and job title. It’s also important to consider their interests, hobbies, and values. This information will help developers understand the user’s mindset and what is important to them.

Their Goals and Objectives

The next component of a persona is their goals and objectives. This includes what the user is trying to accomplish, and what their ideal outcome would be. Developers should understand the user’s motivation for using the product or service and what they hope to gain from it.

The Barriers Preventing Them from Achieving Their Goals

In addition to understanding the user’s goals, it’s important to identify the barriers preventing them from achieving their goals. This could be anything from a lack of time or resources to a lack of knowledge or understanding. Understanding these barriers will help developers design solutions that overcome these obstacles.

Identifying Pain Points and Needs

Finally, it’s important to identify the user’s pain points and needs. This includes anything that frustrates or hinders the user’s experience, as well as their underlying needs and desires. Identifying pain points and needs will help developers design solutions that address these issues and create a positive user experience.

Creating a Simple Persona Example

Overview of the Example Persona

Now that we have covered what makes a good persona and its components, let’s dive into creating a simple persona example.

Meet John, a 35-year-old stay-at-home dad who is interested in improving his cooking skills. John has two young children and is responsible for preparing their meals. He enjoys cooking and is always looking for new recipes to try. John also works part-time from home as a freelance graphic designer.

Step-by-Step Guide to Creating a Simple Person

  1. Conduct Research – The first step in creating a persona is to conduct research to gather information about your target audience. This can be done through surveys, interviews, or by studying existing data.
  2. Create a Profile – Once you have gathered enough data, create a profile for your persona. This should include basic demographic information such as age, gender, occupation, and education.
  3. Identify Goals and Objectives – Determine the goals and objectives of your persona. In John’s case, his goal is to improve his cooking skills so he can prepare healthy and delicious meals for his family.
  4. Identify Barriers – Identify the barriers that are preventing your persona from achieving their goals. For John, it may be a lack of time, resources, or knowledge.
  5. Identify Pain Points and Needs – Determine the pain points and needs of your persona. For John, it may be finding quick and easy recipes that he can prepare in a short amount of time, or learning how to cook healthy meals on a budget.

By creating a simple persona like John, you can better understand your target audience and create products or services that meet their needs and solve their problems.

In the next section, we will explore how to use personas in development.

How to Use a Persona in Development

Benefits of Using Personas in Development

Developing user personas offers several benefits for the development process. Firstly, it provides a clear understanding of the users’ goals, preferences, and pain points, which can help design better products. Secondly, it offers insight into how users may behave, what they may want, and what they may be willing to pay for. Thirdly, personas can help prioritize features, ensuring that development efforts are aligned with users’ most critical needs.

Ways to Incorporate Personas in Development Process

Incorporating personas into the development process can help ensure that the final product meets the needs and preferences of the target audience. One way to achieve this is by integrating personas into the design thinking process. This involves empathizing with the user, defining the problem, ideating solutions, prototyping, and testing. Personas can also be incorporated into the user stories, ensuring that development efforts are focused on meeting user needs. Finally, personas can be used to validate design decisions by conducting user testing with individuals who fit the persona characteristics.

By incorporating personas into the development process, developers can ensure that the final product meets the needs of the target audience, which can lead to higher user satisfaction and increased adoption rates.

Photo by Med Badr Chemmaoui on Unsplash

How to Create Better Personas as a Uni Student

Creating accurate and realistic user personas is crucial for developing successful products and services. As a university student, it is important to understand the strategies and tools for effective persona development.

Research Strategies for Creating Personas

To create a good persona, it is essential to conduct thorough research on the target audience. As a student, you can use various research strategies such as surveys, interviews, and focus groups. These strategies can help you gather valuable insights into users’ behaviours, goals, motivations, and pain points.

Tips for Effective Persona Development

  1. Identify User Goals: Start by identifying the user’s goals and objectives. This will help you understand what the user wants to achieve from the product or service.
  2. Segment Your Audience: Divide your target audience into specific segments based on demographics, behaviours, or other relevant factors. This will help you create more accurate and personalized personas.
  3. Keep Personas Realistic: Avoid making assumptions or creating unrealistic personas. Use actual data and insights to create personas that reflect the real users.
  4. Use Visuals: Use visuals such as images, videos, and infographics to make the personas more engaging and memorable.

Tools and Resources for Persona Creation

As a student, there are many online tools and resources that you can use to create effective personas. Some of these include:

  1. Persona Templates: Many online platforms provide free persona templates that you can use as a starting point for your research.
  2. Survey and Data Analysis Tools: Tools such as Google Forms and SurveyMonkey can help you collect and analyze user data.

By using these tools and following the tips outlined above, you can create accurate and effective personas that will help you develop successful products and services.

Conclusion

In conclusion, user personas are a crucial component of the development process for any product or service. By creating detailed, accurate, and realistic personas, developers and designers can better understand their target audience and create a product that meets their needs and solves their pain points.

When creating personas, it’s important to consider who the user is, what their goals and objectives are, and what barriers may prevent them from achieving those goals. By identifying pain points and needs, developers can design a product that provides the best user experience.

Creating good personas can be a challenging task, but with the right research strategies, effective persona development tips, and the use of tools and resources, uni students can create accurate and realistic personas that can be used in the development process.

Remember, personas should not be static and should be updated regularly as user needs and behaviours change. By incorporating personas into the development process, developers and designers can ensure that the end product is user-centred and meets the needs of their target audience.

In summary, user personas are an essential tool for product development, and by creating accurate and realistic personas, uni students can contribute to the development of user-centred products and services that provide the best user experience.

Speed Up Your Computer with These Healthy Habits

Photo by Cookie the Pom on Unsplash

Introduction

Have you ever been frustrated by a slow and unresponsive computer? Whether you’re trying to work, browse the web, or play games, a slow computer can be a major hindrance to productivity and enjoyment. Fortunately, there are many healthy habits and tips you can follow to improve your computer’s speed and performance, without having to spend a lot of money on hardware upgrades. In this article, we’ll explore these tips and habits, so you can say goodbye to slow load times and enjoy a faster, more efficient computer. Let’s get started!

Healthy Habits to Improve Your Computer’s Speed

One of the most important ways to keep your computer running fast and smoothly is by adopting healthy habits. These habits involve regular maintenance and upkeep of your computer to prevent performance issues. By following these habits, you can improve your computer’s speed and efficiency, and prolong its lifespan. Here are some healthy habits to consider:

A. Keep Your Computer Clean and Dust-Free

Over time, dust and debris can accumulate inside your computer, which can cause it to overheat and slow down. That’s why it’s important to clean your computer regularly and keep it free of dust and debris. Here are some tips for cleaning your computer:

  • Turn off your computer and unplug it from the wall.
  • Use a can of compressed air to blow out dust and debris from the fans and vents.
  • Use a soft, lint-free cloth to wipe down the exterior of your computer and the keyboard.
  • Avoid using harsh chemicals or abrasive materials that can damage your computer.

By keeping your computer clean and dust-free, you can improve its airflow and prevent overheating, which can lead to faster performance.

B. Keep Your Computer Updated

Outdated software can cause your computer to slow down and become vulnerable to security threats. That’s why it’s important to keep your computer updated with the latest software and security patches. Here are some tips for keeping your computer updated:

  • Enable automatic updates for your operating system and software.
  • Check for updates manually on a regular basis.
  • Install updates as soon as they become available.
  • Uninstall outdated software that you no longer use.

By keeping your computer updated, you can ensure that it’s running smoothly and securely, which can lead to faster performance.

C. Uninstall Unused Programs

Unused programs can take up valuable space on your hard drive and slow down your computer. That’s why it’s important to regularly uninstall programs that you no longer use. Here are some tips for uninstalling unused programs:

  • Use the built-in uninstaller for the program.
  • Use a third-party uninstaller program to remove any leftover files and registry entries.
  • Be careful when uninstalling programs that are required by other programs or the operating system.

By uninstalling unused programs, you can free up space on your hard drive and improve your computer’s speed and performance. Software such as CCleaner can be especially helpful.

Software-Based Tips to Speed Up Your Computer

In addition to adopting healthy habits, there are also software-based tips you can follow to speed up your computer. These tips involve optimizing your computer’s software settings and removing unnecessary programs and files. By following these tips, you can give your computer a performance boost without having to purchase any new hardware. Here are some software-based tips to consider:

A. Disable Startup Programs

When you turn on your computer, certain programs may automatically launch in the background, which can slow down your computer’s startup time. That’s why it’s important to disable any unnecessary startup programs. Here are some tips for disabling startup programs:

  • Open the Task Manager (Ctrl + Shift + Esc) and click on the “Startup” tab.
  • Disable any programs that you don’t want to launch at startup.
  • Be careful when disabling programs, as some programs may be required for your computer to function properly.

By disabling unnecessary startup programs, you can speed up your computer’s startup time and improve its overall performance.

B. Remove Unused Files and Programs

As you use your computer, you may accumulate a lot of unused files and programs, which can take up valuable space on your hard drive and slow down your computer. That’s why it’s important to regularly remove any unused files and programs. Here are some tips for removing unused files and programs:

  • Use the built-in Disk Cleanup utility to remove temporary files and other unnecessary files.
  • Use a third-party disk cleaner program to remove any leftover files and other junk data.
  • Uninstall any unused programs that are taking up space on your hard drive.

By removing unused files and programs, you can free up space on your hard drive and improve your computer’s speed and performance.

C. Adjust Visual Settings

Windows and other operating systems come with a variety of visual settings that can impact your computer’s performance. For example, certain visual effects such as animations and transparency can use up valuable resources and slow down your computer. That’s why it’s important to adjust your visual settings to optimize performance. Here are some tips for adjusting your visual settings:

  • Open the Control Panel and navigate to the “System and Security” section.
  • Click on “System” and then click on “Advanced System Settings.”
  • Click on the “Settings” button under the “Performance” section.
  • Choose the “Adjust for best performance” option, or manually adjust specific settings that you want to keep.

By adjusting your visual settings, you can optimize your computer’s performance and improve its speed and responsiveness.

These are just a few software-based tips you can follow to speed up your computer. By optimizing your software settings and removing unnecessary programs and files, you can give your computer a performance boost without having to purchase any new hardware.

Hardware-Based Tips to Speed Up Your Computer

If you’ve already adopted healthy habits and followed software-based tips but still find that your computer is slow, it may be time to consider upgrading your hardware. Upgrading your hardware can improve your computer’s speed and performance, but it can also be expensive. That’s why it’s important to consider which hardware upgrades will provide the most bang for your buck. Here are some hardware-based tips to consider:

A. Upgrade Your RAM

RAM, or Random Access Memory, is the short-term memory that your computer uses to store and access data while it’s running. If you don’t have enough RAM, your computer may struggle to keep up with demanding applications and multitasking. That’s why upgrading your RAM can be a cost-effective way to improve your computer’s speed and performance. Here are some tips for upgrading your RAM:

  • Determine how much RAM your computer currently has by checking your system specifications.
  • Determine how much RAM your computer needs by considering the types of applications you use and how much multitasking you do.
  • Purchase the correct type and amount of RAM and install it according to your computer’s specifications.

By upgrading your RAM, you can give your computer more short-term memory to work with, which can improve its speed and responsiveness.

B. Upgrade Your Storage Drive

Your computer’s storage drive is where all of your files and programs are stored. If you have an older or slower storage drive, it can slow down your computer’s performance, especially when accessing and opening large files. That’s why upgrading your storage drive can be a worthwhile investment. Here are some tips for upgrading your storage drive:

  • Determine which type of storage drive is compatible with your computer (e.g. SATA, PCIe, NVMe).
  • Determine how much storage space you need by considering how many files and programs you have.
  • Purchase a new storage drive and install it according to your computer’s specifications.

By upgrading your storage drive, you can improve your computer’s read and write speeds, which can significantly improve its overall performance.

C. Upgrade Your Processor

Your computer’s processor, or CPU, is the brain of your computer. It’s responsible for executing commands and running programs. If you have an older or slower processor, it can slow down your computer’s performance, especially when running demanding applications. That’s why upgrading your processor can be a costly but worthwhile investment. Here are some tips for upgrading your processor:

  • Determine which type of processor is compatible with your computer’s motherboard.
  • Determine how much processing power you need by considering the types of applications you use and how much multitasking you do.
  • Purchase a new processor and install it according to your computer’s specifications.

By upgrading your processor, you can significantly improve your computer’s performance and make it more capable of running demanding applications.

These are just a few hardware-based tips you can follow to speed up your computer. By upgrading your RAM, storage drive, or processor, you can give your computer a significant performance boost. However, it’s important to weigh the costs and benefits of hardware upgrades before making a purchase.

Conclusion

In conclusion, there are many ways to speed up your computer, both through software-based and hardware-based methods. By adopting healthy habits like regularly cleaning up your computer and keeping it updated, you can prevent performance issues before they occur. Additionally, by following software-based tips like disabling unnecessary programs and optimizing your settings, you can improve your computer’s speed and responsiveness. If you’re still experiencing performance issues, it may be time to consider hardware upgrades like upgrading your RAM, storage drive, or processor. However, it’s important to carefully consider the costs and benefits of each upgrade before making a purchase.

Remember, a slow computer can be frustrating, but there are many things you can do to speed it up. By following the tips in this article and staying proactive about maintaining your computer’s health, you can ensure that it performs at its best.

If you have any other tips or suggestions for speeding up a computer, feel free to share them by emailing me at [email protected] . And if you found this article helpful, don’t forget to share it with your friends and followers!


How to cheat in Chrome’s Dino game

Chrome’s dinosaur game has been entertaining offline users since 2014. Appearing when you have no internet or by going to chrome://dino we’ve probably all seen or played it at least once.

The aim of the game is to get the little dinosaur as far as possible. While running you build up your score, whilst avoiding all the obstacles that are thrown at your from the right of the screen. If however you are bored of playing the game normally and want to know how to get invincibility or a ridiculously high score then your in the right place.

How to make the dino invincible

Inspect on dino game

To become invincible and cause the game to never end, you’ll need to access the DevTools menu by pressing F12.

To enable invincibility you need to enter the following into the console, copy & paste is recommended.

var oldGameOver = Runner.prototype.gameOver
First command on dino game

This has stored the old game over code into a variable called oldGameOver now we can overwrite the existing code. Now paste this line into the console.

Runner.prototype.gameOver = fn (){}
Second command on dino game

With this the game has no game over feature, that means you can happily run with no problems.

How to get High Scores

This works best whilst also using the the above trick to turn invincible. To get really high scores what we can do is change the dino’s speed, this means it’ll run faster, causing us to get more points.

The command is the following, 1000 is recommended as any higher might cause instability

Runner.instance_.setSpeed(1000)

Now there’s nothing stopping you from easily reaching over 100,000 points.


NodeJS vs. Other Technologies: Which To Choose?

As a web developer, choosing the right backend technology is crucial to the success of your project. With so many options available, it can be overwhelming to decide which tool is best suited for your needs. In this article, we will compare NodeJS with other popular backend technologies, including Ruby on Rails, Django, .NET, and Laravel. We will discuss the advantages and disadvantages of each technology and provide real-world examples of companies that use them. Additionally, we will explore the use of NodeJS in education and why it’s a great starting point for students. By the end of this article, you will have a better understanding of how to choose the right backend technology for your web project.

NodeJs

Overview of NodeJS

NodeJS is an open-source, cross-platform JavaScript runtime environment that allows developers to build scalable and high-performance applications. It was developed by Ryan Dahl in 2009 and has gained a lot of popularity in recent years due to its unique features.

Advantages of Using NodeJS

One of the main advantages of using NodeJS is its performance. NodeJS is built on Chrome’s V8 JavaScript engine, which is known for its high performance. NodeJS is also event-driven and non-blocking, which makes it ideal for building real-time applications that require a lot of data processing. Additionally, NodeJS has a large and active community, which means that there are a lot of libraries and tools available to help you build your application.

Disadvantages of Using NodeJS

One of the main disadvantages of using NodeJS is its steep learning curve once you have progressed past the basics. NodeJS requires developers to learn asynchronous programming, which can be challenging for those who are used to synchronous programming. Additionally, NodeJS has some limitations when it comes to CPU-bound tasks, which means that it may not be the best choice for applications that require a lot of CPU processing.

Real-World Examples of Companies that Use NodeJS

Some of the most popular companies that use NodeJS include Netflix, LinkedIn, and PayPal. Netflix uses it to build their user interface and handle server-side rendering, while LinkedIn uses NodeJS for their mobile and web applications. PayPal also uses NodeJS for their checkout flow and other backend services. These companies have seen a lot of success using it and have contributed to its growing popularity.

Other Backend Technologies

Comparison of Other Popular Backend Technologies

While NodeJS has a lot of advantages, it’s important to consider other popular backend technologies as well. Some of the other popular backend technologies include Ruby on Rails, Django, .NET, and Laravel.

Ruby on Rails

Ruby on Rails is an open-source web framework that is built on the Ruby programming language. It’s known for its simplicity and convention over configuration approach, which makes it easy to get started with. Ruby on Rails is also highly productive, which means that you can build applications quickly. However, Ruby on Rails can be slow and may not be the best choice for applications that require a lot of data processing.

Django

Django is a high-level Python web framework that is known for its robustness and security. Following the Don’t Repeat Yourself (DRY) principle, which means that you can write less code and achieve more. It is also highly scalable, which makes it a good choice for large applications. However, Django has a steep learning curve and may not be the best choice for beginners.

.NET

.NET is a framework developed by Microsoft that supports multiple programming languages, including C# and Visual Basic. It’s known for its speed and performance, which makes it a good choice for building enterprise-level applications. .NET is also highly scalable and has a large community, which means that you’ll have a lot of support. However, .NET can be expensive and may not be the best choice for small projects.

Laravel

Laravel is a free, open-source PHP web framework that is known for its elegance and simplicity. Following the Model-View-Controller (MVC) architecture, which makes it easy to separate your code and maintain your application. It also has a large and active community, which means that you’ll have a lot of support. However, Laravel can be slower than other frameworks and may not be the best choice for applications that require a lot of data processing.

Advantages and Disadvantages of Each Technology

Each of the backend technologies discussed above has its own advantages and disadvantages. It’s important to consider these factors when choosing a technology for your web project. Some of the factors to consider include the project requirements, team skills, community support, and scalability.

NodeJS in Education

NodeJS is becoming increasingly popular in universities due to its ease of use and versatility. It’s an excellent starting point for students who want to learn web development and gain practical experience. Here are some reasons why NodeJS is a popular choice in education:

Easy to Learn

NodeJS at a basic level is relatively simple, making it easy for students to learn. It has a simple and intuitive syntax that’s similar to JavaScript, which is a language that most students are already familiar with. Students can quickly start building applications using NodeJS, which helps them gain practical experience.

Versatile

NodeJS is a versatile technology that can be used to build a wide range of applications, from simple web applications to complex real-time applications. This versatility makes it an excellent choice for students who want to learn how to build different types of applications.

Large Community

NodeJS has a large and active community that provides excellent support to users. This community includes developers, educators, and students who are passionate about technology. This support can be invaluable for students who are just starting and need help troubleshooting issues.

In-Demand Skill

NodeJS is an in-demand skill in the job market, and many companies are looking for developers who have experience with the technology. By learning it in university, students can gain practical experience and improve their job prospects.

Comparison to Other Web Development Frameworks

NodeJS has some significant differences when compared to other popular web development frameworks, such as Laravel. Let’s take a look at some of the main differences:

Performance

NodeJS has a significant advantage when it comes to performance. It’s built on top of the V8 JavaScript engine, which is incredibly fast and efficient. This allows it to handle a high volume of requests quickly, making it an excellent choice for building real-time applications.

In contrast, Laravel is built on PHP, which is generally slower. While Laravel has improved its performance over the years, it still can’t match the speed and efficiency of NodeJS.

Scalability

NodeJS is also highly scalable, thanks to its event-driven architecture. It’s designed to handle large amounts of data and can easily scale to meet the demands of growing applications. This makes it an excellent choice for building large-scale applications that require high scalability.

Laravel, on the other hand, can be more challenging to scale. While it’s possible to scale Laravel applications, it requires more effort and expertise to do so.

Learning Curve

Finally, NodeJS has a lower learning curve than Laravel. While both technologies require some learning, It is easier to learn for developers who are already familiar with JavaScript. However, Laravel has a steeper learning curve and requires developers to learn PHP and Laravel-specific concepts.

Getting Started with NodeJS

If you’re new to NodeJS and want to get started, here are some resources to help you:

Official Documentation

The official NodeJS documentation is an excellent resource for learning about the technology. It includes guides, tutorials, and API references that cover everything you need to know to start building applications with NodeJS. The documentation is continually updated, ensuring that it’s always up-to-date with the latest releases.

Online Courses

There are many online courses available that can help you learn NodeJS. Platforms like Udemy, Coursera, and Pluralsight offer courses that cover NodeJS from beginner to advanced levels. These courses can be an excellent way to gain practical experience and learn from experienced developers.

Online Communities

Online communities like Reddit, Stack Overflow, and GitHub can be valuable resources for learning about NodeJS. These communities include developers who are passionate about the technology and are willing to help beginners troubleshoot issues and answer questions.

Conclusion

In conclusion, NodeJS is an essential technology for modern web development, providing a powerful runtime environment for building scalable and high-performance web applications and APIs. Whether you’re a student just starting in web development or an experienced developer looking to build the next big thing, NodeJS has something to offer.

We’ve covered the basics of what NodeJS is, its advantages, how it compares to Laravel, and its use in universities. NodeJS’s simplicity, scalability, and ease of use make it an attractive choice for many developers and students alike.

If you’re considering using NodeJS for your next project, we encourage you to explore the vast community and resources available online. NodeJS is constantly evolving, and staying up-to-date with the latest developments can help you build better, more efficient web applications.

We hope this article has been helpful in understanding the basics of Node, and how it can be used in web development. If you have any questions or comments, please feel free to reach out.


Laravel, a framework

If you’re a web developer, chances are you’ve heard of Laravel. For good reason, this PHP web framework has gained a lot of popularity over the years. As someone who’s been using Laravel for a while now, I can tell you that it’s a joy to work with.

One of the things I love about Laravel is its simplicity. It’s easy to read and easy to understand, even if you’re new to web development. But don’t let its simplicity fool you – Laravel is also incredibly powerful. It comes with a ton of built-in features that make it easy to do things like authentication, routing, and database management.

One of my favourite things about Laravel is its MVC architecture. This might sound like a fancy term, but it’s so easy to use. It just means that the code for your application is divided into three parts: the model, the view, and the controller. This makes it easy to keep your code organized and maintainable.

Artisan tools

Another thing I love about Laravel is its Artisan command-line interface. If you’re not accustomed to working with the command line, it may seem scary, but it’s actually a straightforward process. Artisan makes it easy to do things like generate boilerplate code and run database migrations. It even allows you to create your own custom commands!

Its routing

Laravel also has a really powerful routing system. This just means that it’s easy to define the routes for your application and map them to specific controller actions. This makes it easy to create clean, readable URLs for your application.

Using databases

If you’re working with databases, you’ll love Laravel’s Eloquent ORM. This might sound like another scary term, but it’s actually really simple. Eloquent makes it easy to work with databases in your application. It provides a simple syntax for doing things like querying data and saving data to the database.

Overall, I think Laravel is a fantastic choice for web developers. It’s easy to learn, easy to use, and incredibly powerful. Laravel provides everything you need to build a simple blog or a complex web application. So why not give it a try and see for yourself? I promise you won’t be disappointed!


Five Excel Tips and Tricks – Part 1

Excel logo

Whether you use Excel frequently or rarely, for work or for tracking in-game items, here are 5 tips and tricks that may help you save time in the future.

1. Inserting today’s date

You can very quickly insert today’s date into any cell simply by pressing “CTRL ;”

This little shortcut can be very helpful over time and more often than not be used on most spreadsheets if you want to track the day it was made.

Example of today's date from pressing "CTRL ;" in excel
Example of pressing CTRL ;

2. Repeat… Repeat!

In Excel there often comes a time when you want to repeat the last formula/action you made, there is a shortcut combo for this, F4.

Just press F4 next time you want to repeat an action on another cell, just click the cell and F4.

3. Search in Excel?

If you are stuck in a certain area or with a certain formula, press: “Alt Q”, this will let you search for what you are trying to do!

More often than not typing in the exact formula will bring up a formula wizard for you to use, providing clear and understandable instructions on what you need to do.

4. Keep it simple, Cut/Copy & Paste

You can drastically speed up your workflow with shortcuts, perhaps the best shortcut is Copy & Paste.

  • To copy press “CTRL C”
  • To cut press “CTRL X”
  • Finally to paste press “CTRL V”

5. Excel’s autosum?

Excel has a shortcut that will automatically sum your rows or columns, this can help stop you from having to select the thousands of cells you might have before you can sum them.

To autosum just press “ALT =”

That’s all folks

That concludes the 5 tips and tricks for excel part 1, hopefully you find them useful, come back again soon for part 2.


How to install Python on Windows

Installation

The first step to becoming a Python developer is to download it. You can set it up in many different ways moreover there are many different versions. We are going to be installing the most updated version available at the time of writing 2022-02-10.

Check if Python already exists

If you are already a developer it may be possible that Python already exists on your system. If so then you do not need to reinstall it. Unless you wish to update or move to a newer version.

To check if you have it installed open your command line and type the following.

python --version

You should see something similar to the following.

Example output of python --version

Installing/Updating Python

On the official website, choose the latest Windows download available, for me it is 3.10.2.

Where the download button is situated on the Python.org website

Run the newly downloaded installer and follow these steps.

  1. Select “Install for all users” and “Add to PATH”
  2. Select Install Now and python should be installed onto your system.
  3. If the option appears select “Disable path length limit” this will fix any path conflicts that many occur.

Checking installation

Now you have installed it, you can run the command from above to verify if it works successfully, furthermore, you can check the version number of your installation.

python --version

This concludes the installation process, read our other posts on getting started in python with a simple “Hello world!” program.

Uninstalling

To uninstall your installation, you need to navigate to Control Panel -> Programs -> Uninstall a program.

From here you can select your installation and click uninstall.

Uninstalling can be helpful if your installation starts playing up, you want to reset it back to factory defaults or you want to change to a different version.


How to install Laravel on Windows (With Tailwind)

Laravel featured image

This tutorial will guide you on how to install Laravel on windows so you can begin to develop and create websites with the framework. Additionally, we will also install Tailwind, a super easy to use CSS framework.

Requirements

Laravel uses Composer to manage all of its dependencies, to download Composer click here, or use our tutorial on installing Composer on Windows.

Installing

With Composer installed open your command line and run the following command. It will install Laravel globally on your computer and also add itself to the path.

composer global require laravel/installer

Testing it works

Now we will quickly check it has installed correctly. Create or navigate to a folder for testing and open it within the command line.

laravel new testApp
cd testApp
php artisan serve
Image of Laravel's start page
Laravel start page

You should now be able to see in your browser the default Laravel Page. Congratulations you have successfully installed Laravel, now have fun making something brilliant.

Installing Tailwind on Laravel

Requirements

Installing Tailwind requires NPM you can download that here, or follow our tutorial here.

Installation

Tailwind is a super easy-to-use CSS framework, if you wish to use it with Laravel you will need to follow the steps below on each new project you start.

First of all, make sure you are within a Laravel project or are in the test folder from above. You can then run the installation command.

npm install -D tailwindcss postcss autoprefixer

This installs Tailwind. Next, we initialise Tailwind within the project and generate its config files.

npm tailwindcss init

Now we need to add Tailwind to the Mix config file. Open the file called webpack.mix.js and add tailwindcss as a plugin.

tailwindcss added as a plugin

Next, we add our blade templates to the tailwind.config.js file. We are adding all possible templates even if we do not necessarily use all of them in the project e.g. Vue.js.

Templates added to tailwind config file

Finally, we can add the directives to our projects /resources/css/app.css file.

To have your app update the CSS as you develop you can run.

npm run watch

Optionally you can have all the CSS preloaded during development.

npm run dev

When you are ready to release for production you can run the following command to have only the CSS you require for your project within app.css.

npm run prod

This concludes the tutorial on how to install Laravel and Tailwind, go forward and create something amazing!


How to install Node.js and NPM on Windows

Introduction

Node.js is a Javascript runtime environment, it is used to process data and scripts before sending them forward to web browsers, it comes with NPM, the Node Package Manager. Both of which are incredibly useful in web-based development.

Installing Node.js

In your browser of choice navigate to the Node.js download page and click on the Windows installer, if you are using a different operating system click on the system you use.

With the file downloaded you will now need to progress through the installation steps.

Node installation Wizard
  1. Run the downloaded executable.
  2. On the welcome screen click Next.
  3. Accept the user license agreement click Next.
  4. The wizard will automatically select an installation location, you can change this but we would recommend leaving this at its default value. Then click Next.
  5. The wizard will ask you to select any additional components, once again we recommend leaving this at the default values before clicking Next.
  6. Node will then alert you to install necessary tools so it can compile npm modules. If you do not know what this mean leave the box unticked. If you know that you will need to compile modules then you can tick the box.
  7. Finally you can click the Install button and the Installation will begin.

Check installation

Now we are going to very quickly check that the installation was successful. Open your command prompt and type the following command. It will print out to the console the version of Node your computer has installed.

node -v

Additionally, check that NPM was correctly installed with the following.

npm -v

That concludes how to install and download Node.js and NPM.

Uninstalling Node.js

To uninstall Node.js we recommend navigating to Control Panel -> Programs -> Uninstall a program.

And then selecting Node and clicking uninstall, this will ensure all of the files are correctly uninstalled from your computer.

Uninstalling can be helpful if your Node starts playing up or you want to reset it back to factory defaults, and with that, we conclude our tutorial, we hope it was helpful and Node serves you well in your future projects.


How to install Composer on Windows

Composer is a command-line tool used to manage and download PHP dependencies and tools, today we will be installing it on Windows.

Installing Composer

First, we must download the latest Composer File, we can get this at the official website here.

We want to be clicking on the Composer-Setup.exe link, this will download the Setup executable and will ensure we have the latest file.

Composer installation wizard
Installation wizard

Once the file has been downloaded and you click run you can follow these steps.

  1. Click install for All users, then click next.
  2. Leave developer mode unchecked, we do not want this as it is not the recommend option.
  3. Select the version of PHP you have installed, if you do not have PHP installed then you will need to install it from here.
  4. Composer will then quickly check your PHP before showing you a Proxy setting, leave this blank and click next.
  5. Finally you will be shown an overview, if everything is as we selected click install.

Verifying the installation

To validate that it was installed correctly go to a command prompt and type the following to see your version.

composer --version

You should see something similar to the following.

Uninstalling

To uninstall we recommend navigating to Control Panel -> Programs -> Uninstall a program.

And then selecting Composer and clicking uninstall. This will ensure all of the files are correctly uninstalled from your computer.

Uninstalling can be helpful if it starts playing up or you want to reset it back to factory defaults, and with that, we conclude our tutorial, we hope it was helpful and Composer serves you well in your future projects.


Dummies guide to Pivot Tables in Excel

PivotChart

Welcome to our guide to pivot tables, this guide was a request by a follower, feel free to make a similar request if there is a topic you would like a guide on.

What are pivot tables?

A pivot table allows you to view data like a ‘pick and mix. It enables you to easily select data using different headings from your main data table and place the data in rows or columns. You can then also filter. Changing the layout of a pivot table is far quicker than setting up new spreadsheets each time and without the need to change the raw data. You can also keep creating new pivot tables with differing layouts from the same data.

What does the pivot mean?

The “pivot” in the pivot table just means that you can move the data around to change how you see it. This is what allows you to sort and organize the data.

How to make our own pivot table

To make our table we will first need some data to work on, you can use your own or the provided set of data of some of the top books in 2020.

Download our practice sheet here.

You are advised to check file integrity before opening, this can be done by uploading the file to VirusTotal and checking the returned hash matches the below a7486b3dc0cd5506a2a7343c518655ff37e21441a369b61f01b1e98693ebaf76 or by using your own software to scan the file.

With the data added to excel it should look like the below.

Our next step is to insert a pivot table. Click on the data in the table or select the entire table.  Next click on the Insert Tab, click PivotTable.

With this pop-up, you can change the data, but by default, it should automatically select the entire table, so just click Ok.

Upon clicking Ok the screen will update. Do not worry, you have not lost your data, you will notice that you are now working on a separate sheet. You should also see the PivotTable Fields display.

This may look confusing or scary but don’t worry, we will go through it.

PivotTable Fields

At the top we have our column headers from the table we created, now we can drag these to the boxes below to reorganize our pivot table.

The four boxes will change the display of our table, to understand what will change we need to know what each box does.

Rows

The field you place in rows will most commonly be the data you want to stay present on the screen. In my case I wanted to work with all the books based on their names, which means I put “Name” in the Rows box.

To add data to boxes, you can either click or drag the field into a box, I prefer to drag as it offers more control.

With “Name” now added we can see that the table has been updated to show our book names.

Filters

This box as the name suggests will filter our data based on the item we place inside of it. If we happened to place “Model” inside, we would now have a filter that can either be “Hardback” or “Paperback”. Below is an example of me filtering the books.

Columns

Columns are where we can place a field to have it displayed across the top of our table. Using “Author” now we can provide more helpful data to our table. This would result in our author’s names shown across the top.

Values

In the values column we can have excel display data within the table we have now made. Excel will also automatically sum any data that appears more than once within our set filters. (Example further below) 

Naturally, with these being books, the clear choice to display is the price. Go ahead now and drag “Price” to the Values box and see what happens.

You should have something that now looks like this.

Not only is our table now showing us the price of each book, but it has also given us the grand total for all our books that are paperbacks (Remember that we set a filter). Now try playing around with the filter. You should see that setting it to all or hardbacks will automatically pull the correct data and display it clearly for you to see.

Feel free to play around and change what is in each box to see what happens, the best way to learn is to practice using a test dataset like this. Very soon you will find yourself an expert at pivot tables.

Summing Data

As we mentioned above, excel will also automatically sum any data that appears more than once. This can be especially helpful in large datasets where things with the same name need to be totaled together.

To try this out we are going to go back to our original table, you can do this by clicking onto the other excel sheet. Next, we are going to duplicate the item on the bottom row, your data should now look like the following.

We now need to update our pivot table to see this new data.

Back on the pivot table sheet, Click on your table, and then click PivotTable AnalyzeChange Data Source.

Have you noticed the change?

If you said the Grand Total has increased, well done. The pivot table has detected that we have two of the same book and has added their prices together to show this.

PivotTable Charts

We will now very quickly look at Pivot Table charts, these charts will mimic our filters/rows/columns and prices in their display and as a result, make it very easy to show clear relationships in data.

To make a chart using the data, once again Click on your PivotTable and then go to PivotTable Analyze and finally PivotChart. PivotChart will automatically tell you what tables are possible based on the data we have entered. We are going to select Column and Clustered Column for our table.

Press OK and there we have it, a nicely displayed table showing off all of our products and their prices based on the filter settings.

To progress further, try changing the filters or repeat the guide with your own set of data.


Customise your Spotify, with Spicetify

Spicetify Example, Good for you Olivia Rodrigo

If you are as addicted to listening to music as I am, chances are you have used or still use Spotify. Spotify is a brilliant app but unfortunately, I could never get on with its UI.

Then I discovered Spicetify.

What is Spicetify?

Spicetify is a command-line interface that allows you to completely overhaul Spotify, from themes to even new features I was blown away by how stunning Spotify can look, one thing for sure is on any new PC I’m definitely downloading Spicetify.

How to install Spicetify

First things first you need to make sure you are running the Spotify desktop app and not the windows store version. Then you can install Spicetify easily using PowerShell.

Open PowerShell and paste the following command.

Invoke-WebRequest -UseBasicParsing "https://raw.githubusercontent.com/khanhas/spicetify-cli/master/install.ps1" | Invoke-Expression

This will install Spicetify onto your system from its master branch on GitHub.
Optionally, if you also want access to Spicetify’s marketplace run this command.

Invoke-WebRequest -UseBasicParsing "https://raw.githubusercontent.com/CharlieS1103/spicetify-marketplace/master/install.ps1" | Invoke-Expression

Set up Spicetify

Now Spicetify is installed we can move onto the setup stage.

Type the following into PowerShell

spicetify

This makes Spicetify find your Spotify install and generates the config file.

spicetify backup apply enable-devtool

This applies the default theme and also enables dev tools for you.

If all you wanted was to install Spicetify, congrats you have finished, enjoy your new Spotify client.

My Favorites

If you installed Spicetify marketplace then you will now notice on the Spotify client there is a new button, this is the marketplace, it allows the installation of tons of themes and extensions from a single click.

Marketplace Icon
Marketplace Icon

Here are some of my favorites.

Themes

Dribbblish Dynamic

Dribbblish Dynamic
Dribbblish Dynamic

This theme is my personal favorite and the one I currently use, it overhauls almost all areas of Spotify, providing crisp colour changes on each new song, rounded edges, folder, and playlist icons, it really has it all. You can view its GitHub page here.

Extensions

Play Next

play next extension

Play Next is an extension that provides a feature that really should have been in Spotify from the beginning, it allows you to directly add a song to the top of your play queue, nothing more to be said, it’s brilliant. You can view its GitHub here.

Hide Podcasts

hide podcasts extension

If like me you use other apps for your podcasts, or you simply don’t want to see them on Spotify this is the extension for you. It removes all traces of Podcasts on Spotify, so much that you’ll forget that they were ever offered. View its GitHub page here.

Summary

Overall this was but a glimpse into what is offered by Spicetify but I hope I’ve shown you enough to convince you. Give it a try and get customising, who knows maybe you could even publish your own theme or extension.


How to create a Raspberry Pi Kubernetes Cluster

Raspberry pi cluster

Introduction

The Raspberry Pi is taking the world by storm at the moment, their cheap prices but high performance are making them ideal for many applications, from simple webservers to home automation powerhouses.

Although relatively weak on their own in comparison to an actual desktop pc, you can easily increase the power by creating a cluster. Clustering allows for increases in task performance as the machine then works with others to get the task completed.

In this tutorial, we will set up a Kubernetes cluster on an Ubuntu server and utilize the optimized microk8s platform to get our system up and running smoothly.

Equipment – Required

  • At least two Raspberry Pi (it is preferable one has at least 4GB of ram but in my case, I used two 2GB models)
  • An internet connection
  • A nearby computer connected to the network
  • The IP address of your router
  • At least 2 micro-SD cards (One card per device you are connecting)
  • USB type C cable/cables (One for each device)
  • USB Charging socket (Aim for a supply capable of providing 15 Watts per Raspberry Pi)

Equipment – Optional

I am choosing to run my device headless, if you are not please see the below list for additional equipment you may need.

  • A HDMI monitor
  • A micro-HDMI to HDMI cable (Pi 4 only, Pi 2/3 use regular HDMI)
  • A keyboard

Some additional optional equipment for either performance or aesthetics

  • Ethernet cable (For increase networking speed although you can use Wi-Fi)
  • A 5-port switch (Reduces the trailing of cables and for connecting the devices)
  • A cluster case to hold the Pis
Example of equipment

Making the cluster

Now with all your equipment, you can begin to assemble. If you did happen to buy a cluster case feel free to put your Pi’s inside, make sure not to lose any of the small parts.

The next step is to now download the ubuntu server image we will be using. You can find the iso at the link here. Please make sure to use the 64bit as it allows it to work with microk8s. Once it has been downloaded place your micro-SD cards into your computer and using Pi Imager flash the cards with the downloaded ubuntu image.

With both cards now flashed we are ready to place them into our devices. Connect your cables to the devices and you should see them both power up nicely.

Setting up the Raspberry Pi

These steps need to be done on both of your devices, so you can either repeat the steps are complete them on both devices at the same time. Giving the devices a few minutes for the first setup you should now be able to access them via ssh (if headless) or via keyboard and monitor.

Firstly, we need to find the new IP addresses of the two devices. We can do this easily by going to our router’s page via its IP address and browsing the client list. With the addresses now discovered, on your current device open an ssh client such as Putty and log in with the username and password of ubuntu (If this does not work straight away try again in a few minutes once the devices have finished setting up)

Now log into your devices we must now prepare the system for running microk8s. The first step is to enable c-groups.

This is done by modifying the file /boot/firmware/cmdline.txt using the command below

sudo nano /boot/firmware/cmdline.txt

Then go to the end of the current line and add the following.

cgroup_enable=memory cgroup_memory=1

Now saving and writing the file, we can move on to the next step.

With c-groups now enabled we need it to be running, for this to occur we just need to simply restart the device using:

sudo reboot

With the devices rebooted we can finally install microk8s onto them

sudo snap install microk8s –classic

This will automatically get the latest version of microk8s, if you need a particular version you can append –channel= to get that instead. For more documentation on this, see here For example:

sudo snap install microk8s –classic --channel= 1.19/edge

With microk8s installed we are ready for setting up the cluster’s master and leaf nodes. I strongly recommend using the device with more ram as the master in the cluster, if they are both identical then you can choose either.

Creating the cluster

On the device, you chose as the master node, type the following command.

sudo microk8s.add-node

This will in turn generate a result that will allow you to connect the devices together, it should be similar to ip-address:port-number/token.

Now on your leaf node type microk8s.join and then the returned result

microk8s.join ip-address:port-number/token

Give the devices some time to establish the connection and soon enough type on the master the command of:

microk8s.kubectl get node
Get nodes output example

Should get all the nodes you have added to the master.

Should you wish to, you can also remove nodes using the expected command of:

microk8s remove-node “Name of Node”

My final tip to aid you in your use of microk8s is to set up a quick alias for kubectl, this will not affect anything but will make commands from here quicker for you.

sudo snap alias microk8s.kubectl kubectl


Disclaimer:

This tutorial is based on my experience of setting up, installing, and creating a microk8s cluster. All information provided was correct at the time of writing. In the event of changes, I will attempt to keep the tutorial updated. Please contact me here at [email protected] with the subject “Kubernetes cluster tutorial” if you find any errors or updates that need to be made.

How to schedule emails in Outlook

If you want to convince your boss that you are working late or at night or active extremely early in the morning you might want to learn how to schedule your emails in Outlook.

Outlook is a powerful tool if mastered, today we are looking at email schedules and delays, this will allow you to write, send an email and have it arrive at its destination at a time or at your choosing.

Scheduling a single email

Setting this up is actually very easy, simply begin composing your email as normal and once finished instead of sending go to your ribbon and click on the small arrow in the tags section.

From here you should then see the following menu.

Now click the box Do not deliver before and select the date and time for the email to be sent.

Cancelling or changing a scheduled email

If you suddenly need to change the email and it has not been sent yet, then you are in luck.

Go to your Outbox and select the email you sent.

Now if you simply want to delete the email, you can go ahead and delete it. To change the email, open it up and append your changes. To change its delivery schedule, follow the steps above on setting the time and update the content box with your new desired delivery date.

Delaying all emails

If you wish to delay all the emails you send by up to 2 hours you can apply this very quickly.

Start by clicking Rules and then Manage Rules and Alerts

From here next, select the email account you want to put the delay onto and then press New Rule.

Select Apply rules on messages I send and press next.

If you want to you can configure conditions to trigger this rule, if not click Next.

The last step is to defer delivery by a number of minutes, tick the box and click on the blue “a number of text” and input the amount of time you want to delay messages by.

If you do not want any more conditions, click finish.

Remember to cancel this delay, you can return to Manage rules and alerts and disable it from there.