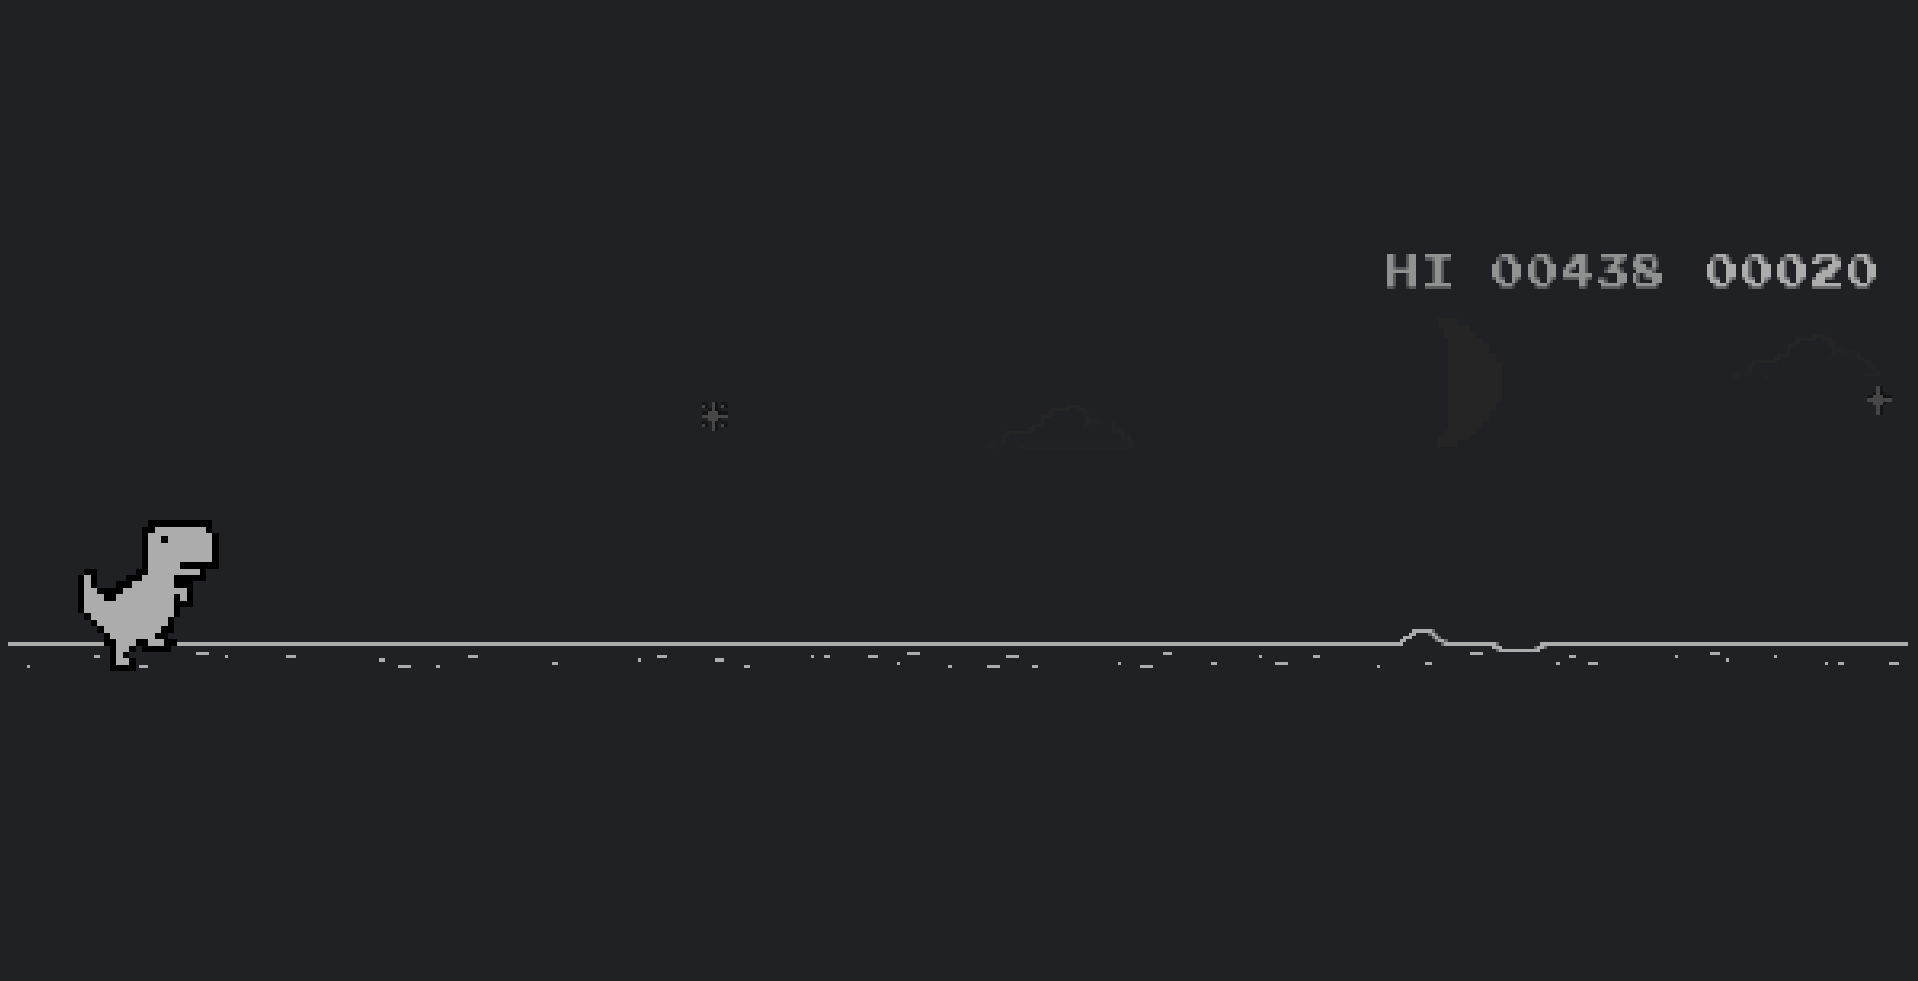
Chrome’s dinosaur game has been entertaining offline users since 2014. Appearing when you have no internet or by going to chrome://dino we’ve probably all seen or played it at least once.
The aim of the game is to get the little dinosaur as far as possible. While running you build up your score, whilst avoiding all the obstacles that are thrown at your from the right of the screen. If however you are bored of playing the game normally and want to know how to get invincibility or a ridiculously high score then your in the right place.
How to make the dino invincible
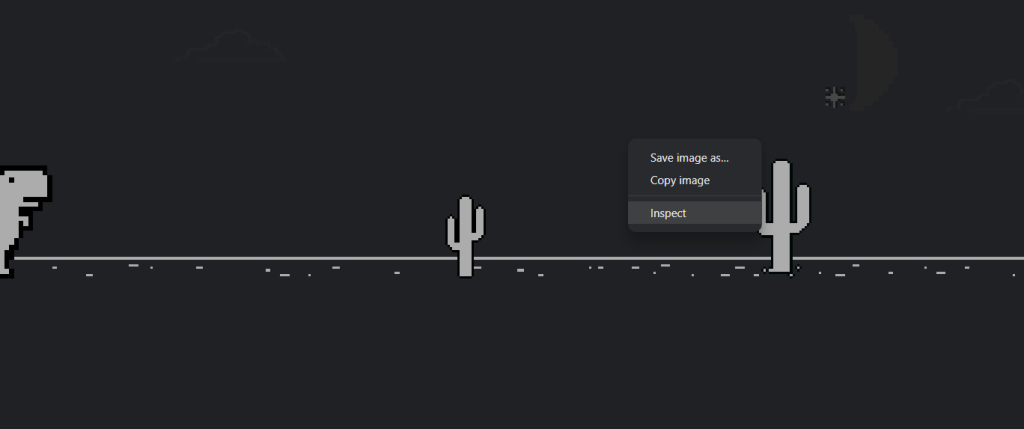
To become invincible and cause the game to never end, you’ll need to access the DevTools menu by pressing F12.
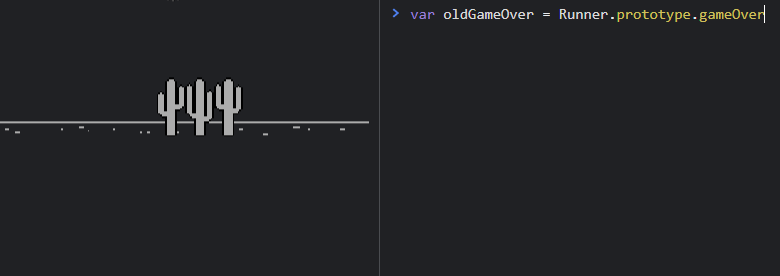
To enable invincibility you need to enter the following into the console, copy & paste is recommended.
var oldGameOver = Runner.prototype.gameOver
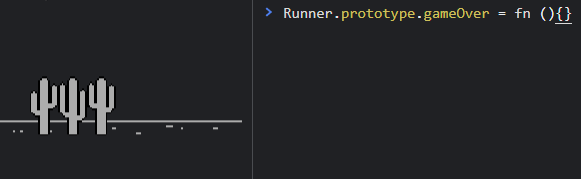
This has stored the old game over code into a variable called oldGameOver now we can overwrite the existing code. Now paste this line into the console.
Runner.prototype.gameOver = fn (){}
With this the game has no game over feature, that means you can happily run with no problems.
How to get High Scores
This works best whilst also using the the above trick to turn invincible. To get really high scores what we can do is change the dino’s speed, this means it’ll run faster, causing us to get more points.
The command is the following, 1000 is recommended as any higher might cause instability
Runner.instance_.setSpeed(1000)
Now there’s nothing stopping you from easily reaching over 100,000 points.
Whether you use Excel frequently or rarely, for work or for tracking in-game items, here are 5 tips and tricks that may help you save time in the future.
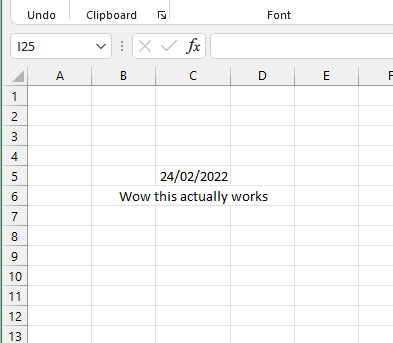
1. Inserting today’s date
You can very quickly insert today’s date into any cell simply by pressing “CTRL ;”
This little shortcut can be very helpful over time and more often than not be used on most spreadsheets if you want to track the day it was made.
Example of pressing CTRL ;
2. Repeat… Repeat!
In Excel there often comes a time when you want to repeat the last formula/action you made, there is a shortcut combo for this, F4.
Just press F4 next time you want to repeat an action on another cell, just click the cell and F4.
If you are stuck in a certain area or with a certain formula, press: “Alt Q”, this will let you search for what you are trying to do!
More often than not typing in the exact formula will bring up a formula wizard for you to use, providing clear and understandable instructions on what you need to do.
Excel has a shortcut that will automatically sum your rows or columns, this can help stop you from having to select the thousands of cells you might have before you can sum them.
To autosum just press “ALT =”
That’s all folks
That concludes the 5 tips and tricks for excel part 1, hopefully you find them useful, come back again soon for part 2.
The first step to becoming a Python developer is to download it. You can set it up in many different ways moreover there are many different versions. We are going to be installing the most updated version available at the time of writing 2022-02-10.
Check if Python already exists
If you are already a developer it may be possible that Python already exists on your system. If so then you do not need to reinstall it. Unless you wish to update or move to a newer version.
To check if you have it installed open your command line and type the following.
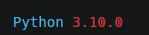
python --version
You should see something similar to the following.
Installing/Updating Python
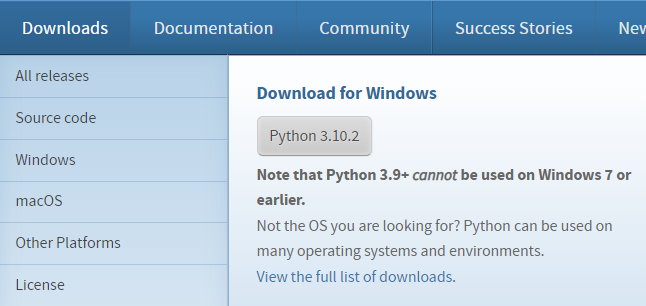
On the official website, choose the latest Windows download available, for me it is 3.10.2.
Run the newly downloaded installer and follow these steps.
Select “Install for all users” and “Add to PATH”
Select Install Now and python should be installed onto your system.
If the option appears select “Disable path length limit” this will fix any path conflicts that many occur.
Checking installation
Now you have installed it, you can run the command from above to verify if it works successfully, furthermore, you can check the version number of your installation.
python --version
This concludes the installation process, read our other posts on getting started in python with a simple “Hello world!” program.
Uninstalling
To uninstall your installation, you need to navigate to Control Panel -> Programs -> Uninstall a program.
From here you can select your installation and click uninstall.
Uninstalling can be helpful if your installation starts playing up, you want to reset it back to factory defaults or you want to change to a different version.
This tutorial will guide you on how to install Laravel on windows so you can begin to develop and create websites with the framework. Additionally, we will also install Tailwind, a super easy to use CSS framework.
With Composer installed open your command line and run the following command. It will install Laravel globally on your computer and also add itself to the path.
composer global require laravel/installer
Testing it works
Now we will quickly check it has installed correctly. Create or navigate to a folder for testing and open it within the command line.
laravel new testApp
cd testApp
php artisan serve
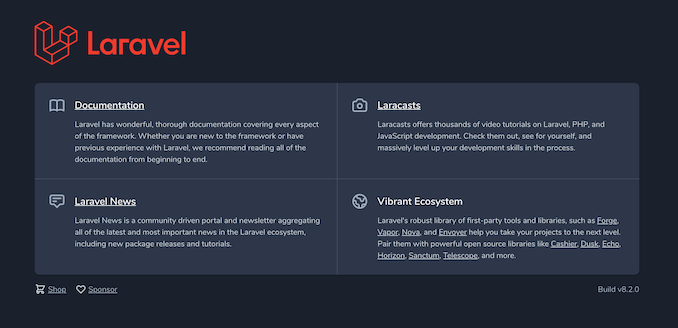
Laravel start page
You should now be able to see in your browser the default Laravel Page. Congratulations you have successfully installed Laravel, now have fun making something brilliant.
Tailwind is a super easy-to-use CSS framework, if you wish to use it with Laravel you will need to follow the steps below on each new project you start.
First of all, make sure you are within a Laravel project or are in the test folder from above. You can then run the installation command.
npm install -D tailwindcss postcss autoprefixer
This installs Tailwind. Next, we initialise Tailwind within the project and generate its config files.
npm tailwindcss init
Now we need to add Tailwind to the Mix config file. Open the file called webpack.mix.js and add tailwindcss as a plugin.
tailwindcss added as a plugin
Next, we add our blade templates to the tailwind.config.js file. We are adding all possible templates even if we do not necessarily use all of them in the project e.g. Vue.js.
Templates added to tailwind config file
Finally, we can add the directives to our projects /resources/css/app.css file.
To have your app update the CSS as you develop you can run.
npm run watch
Optionally you can have all the CSS preloaded during development.
npm run dev
When you are ready to release for production you can run the following command to have only the CSS you require for your project within app.css.
npm run prod
This concludes the tutorial on how to install Laravel and Tailwind, go forward and create something amazing!
Node.js is a Javascript runtime environment, it is used to process data and scripts before sending them forward to web browsers, it comes with NPM, the Node Package Manager. Both of which are incredibly useful in web-based development.
Installing Node.js
In your browser of choice navigate to the Node.js download page and click on the Windows installer, if you are using a different operating system click on the system you use.
With the file downloaded you will now need to progress through the installation steps.
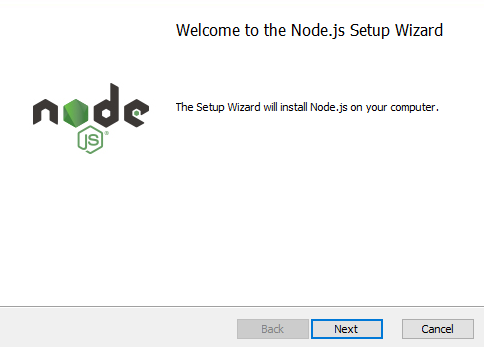
Node installation Wizard
Run the downloaded executable.
On the welcome screen click Next.
Accept the user license agreement click Next.
The wizard will automatically select an installation location, you can change this but we would recommend leaving this at its default value. Then click Next.
The wizard will ask you to select any additional components, once again we recommend leaving this at the default values before clicking Next.
Node will then alert you to install necessary tools so it can compile npm modules. If you do not know what this mean leave the box unticked. If you know that you will need to compile modules then you can tick the box.
Finally you can click the Install button and the Installation will begin.
Check installation
Now we are going to very quickly check that the installation was successful. Open your command prompt and type the following command. It will print out to the console the version of Node your computer has installed.
node -v
Additionally, check that NPM was correctly installed with the following.
npm -v
That concludes how to install and download Node.js and NPM.
Uninstalling Node.js
To uninstall Node.js we recommend navigating to Control Panel -> Programs -> Uninstall a program.
And then selecting Node and clicking uninstall, this will ensure all of the files are correctly uninstalled from your computer.
Uninstalling can be helpful if your Node starts playing up or you want to reset it back to factory defaults, and with that, we conclude our tutorial, we hope it was helpful and Node serves you well in your future projects.
Composer is a command-line tool used to manage and download PHP dependencies and tools, today we will be installing it on Windows.
Installing Composer
First, we must download the latest Composer File, we can get this at the official website here.
We want to be clicking on the Composer-Setup.exe link, this will download the Setup executable and will ensure we have the latest file.
Installation wizard
Once the file has been downloaded and you click run you can follow these steps.
Click install for All users, then click next.
Leave developer mode unchecked, we do not want this as it is not the recommend option.
Select the version of PHP you have installed, if you do not have PHP installed then you will need to install it from here.
Composer will then quickly check your PHP before showing you a Proxy setting, leave this blank and click next.
Finally you will be shown an overview, if everything is as we selected click install.
Verifying the installation
To validate that it was installed correctly go to a command prompt and type the following to see your version.
composer --version
You should see something similar to the following.
Uninstalling
To uninstall we recommend navigating to Control Panel -> Programs -> Uninstall a program.
And then selecting Composer and clicking uninstall. This will ensure all of the files are correctly uninstalled from your computer.
Uninstalling can be helpful if it starts playing up or you want to reset it back to factory defaults, and with that, we conclude our tutorial, we hope it was helpful and Composer serves you well in your future projects.
Welcome to our guide to pivot tables, this guide was a request by a follower, feel free to make a similar request if there is a topic you would like a guide on.
What are pivot tables?
A pivot table allows you to view data like a ‘pick and mix. It enables you to easily select data using different headings from your main data table and place the data in rows or columns. You can then also filter. Changing the layout of a pivot table is far quicker than setting up new spreadsheets each time and without the need to change the raw data. You can also keep creating new pivot tables with differing layouts from the same data.
What does the pivot mean?
The “pivot” in the pivot table just means that you can move the data around to change how you see it. This is what allows you to sort and organize the data.
How to make our own pivot table
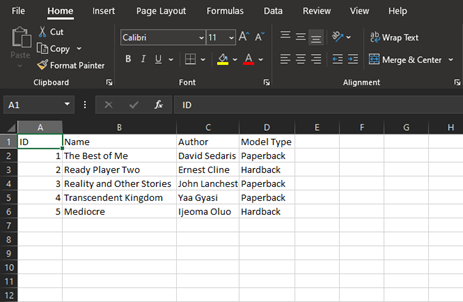
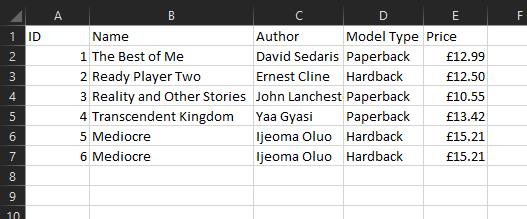
To make our table we will first need some data to work on, you can use your own or the provided set of data of some of the top books in 2020.
You are advised to check file integrity before opening, this can be done by uploading the file to VirusTotal and checking the returned hash matches the below a7486b3dc0cd5506a2a7343c518655ff37e21441a369b61f01b1e98693ebaf76 or by using your own software to scan the file.
With the data added to excel it should look like the below.
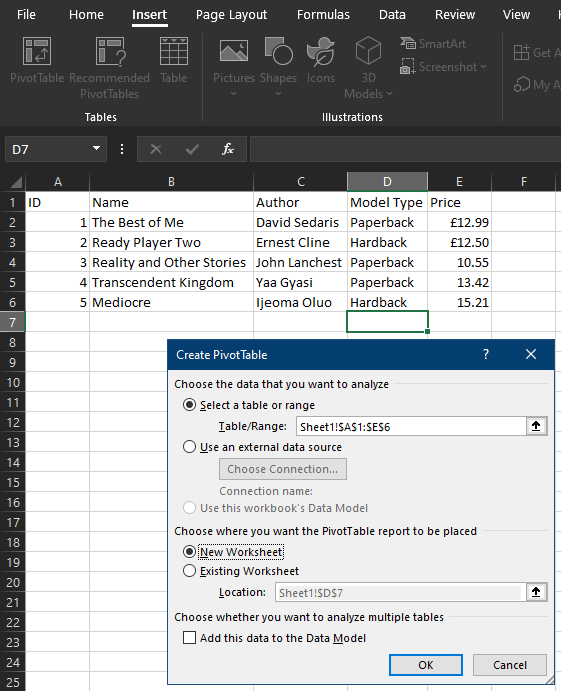
Our next step is to insert a pivot table. Click on the data in the table or select the entire table. Next click on the Insert Tab, click PivotTable.
With this pop-up, you can change the data, but by default, it should automatically select the entire table, so just click Ok.
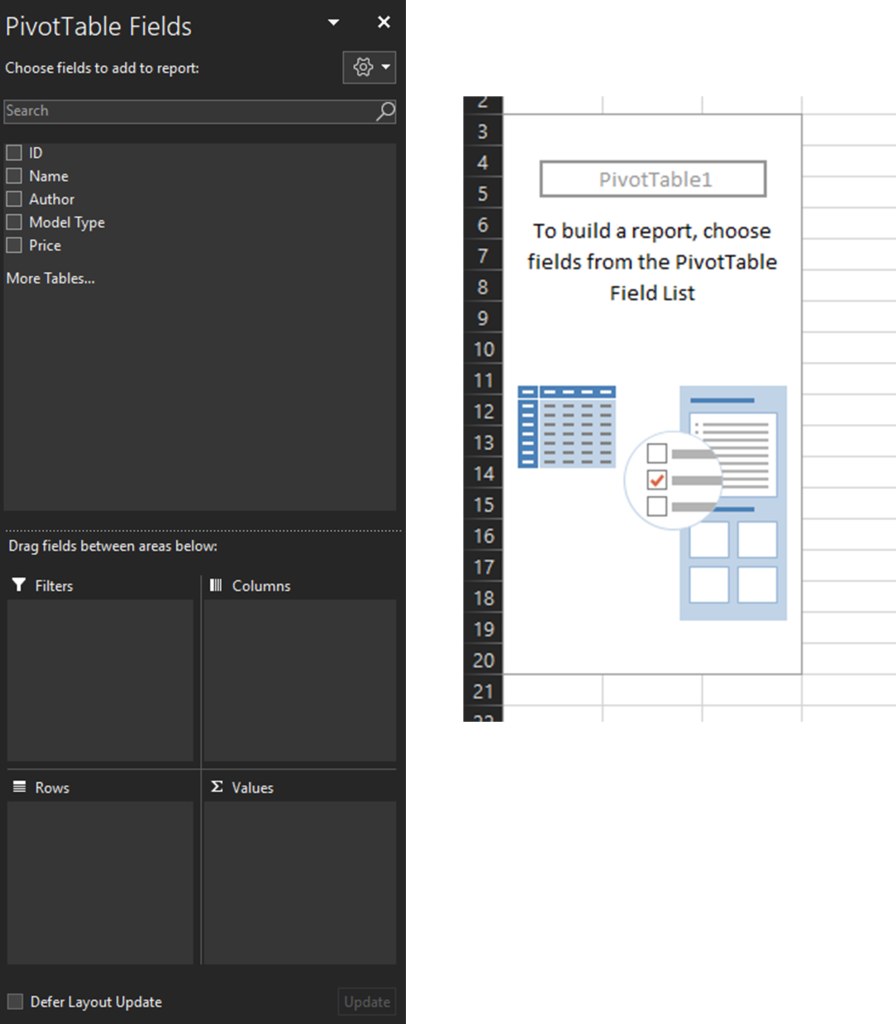
Upon clicking Ok the screen will update. Do not worry, you have not lost your data, you will notice that you are now working on a separate sheet. You should also see the PivotTable Fields display.
This may look confusing or scary but don’t worry, we will go through it.
PivotTable Fields
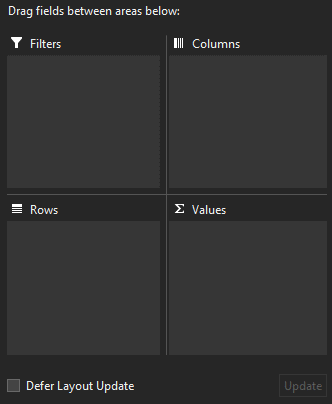
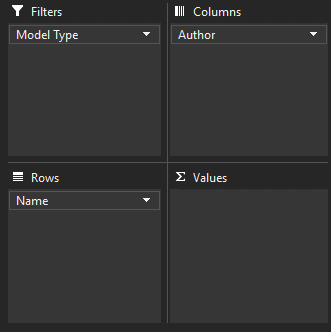
At the top we have our column headers from the table we created, now we can drag these to the boxes below to reorganize our pivot table.
The four boxes will change the display of our table, to understand what will change we need to know what each box does.
Rows
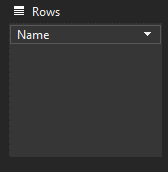
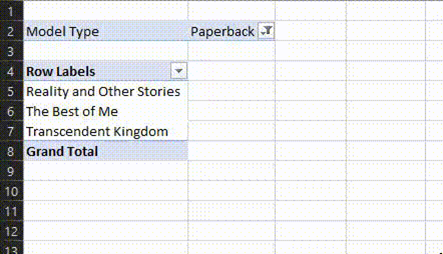
The field you place in rows will most commonly be the data you want to stay present on the screen. In my case I wanted to work with all the books based on their names, which means I put “Name” in the Rows box.
To add data to boxes, you can either click or drag the field into a box, I prefer to drag as it offers more control.
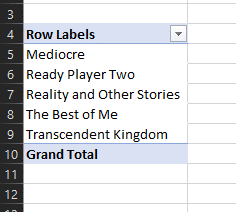
With “Name” now added we can see that the table has been updated to show our book names.
Filters
This box as the name suggests will filter our data based on the item we place inside of it. If we happened to place “Model” inside, we would now have a filter that can either be “Hardback” or “Paperback”. Below is an example of me filtering the books.
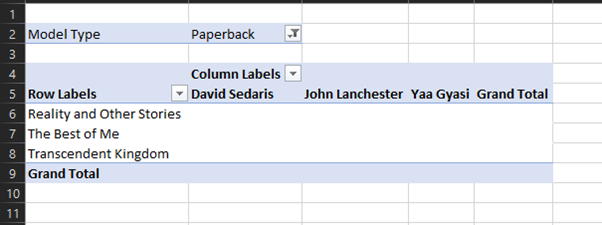
Columns
Columns are where we can place a field to have it displayed across the top of our table. Using “Author” now we can provide more helpful data to our table. This would result in our author’s names shown across the top.
Values
In the values column we can have excel display data within the table we have now made. Excel will also automatically sum any data that appears more than once within our set filters. (Example further below)
Naturally, with these being books, the clear choice to display is the price. Go ahead now and drag “Price” to the Values box and see what happens.
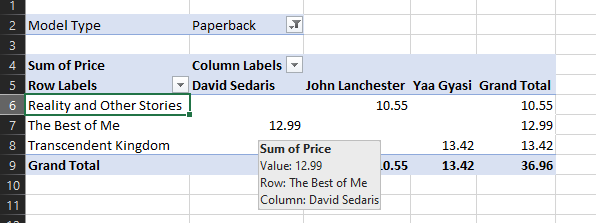
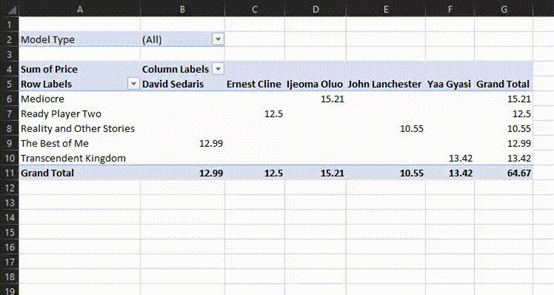
You should have something that now looks like this.
Not only is our table now showing us the price of each book, but it has also given us the grand total for all our books that are paperbacks (Remember that we set a filter). Now try playing around with the filter. You should see that setting it to all or hardbacks will automatically pull the correct data and display it clearly for you to see.
Feel free to play around and change what is in each box to see what happens, the best way to learn is to practice using a test dataset like this. Very soon you will find yourself an expert at pivot tables.
Summing Data
As we mentioned above, excel will also automatically sum any data that appears more than once. This can be especially helpful in large datasets where things with the same name need to be totaled together.
To try this out we are going to go back to our original table, you can do this by clicking onto the other excel sheet. Next, we are going to duplicate the item on the bottom row, your data should now look like the following.
We now need to update our pivot table to see this new data.
Back on the pivot table sheet, Click on your table, and then click PivotTable Analyze, Change Data Source.
Have you noticed the change?
If you said the Grand Total has increased, well done. The pivot table has detected that we have two of the same book and has added their prices together to show this.
PivotTable Charts
We will now very quickly look at Pivot Table charts, these charts will mimic our filters/rows/columns and prices in their display and as a result, make it very easy to show clear relationships in data.
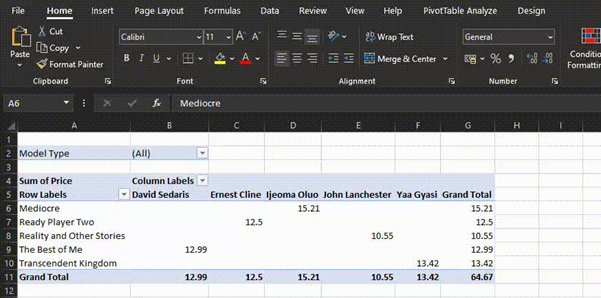
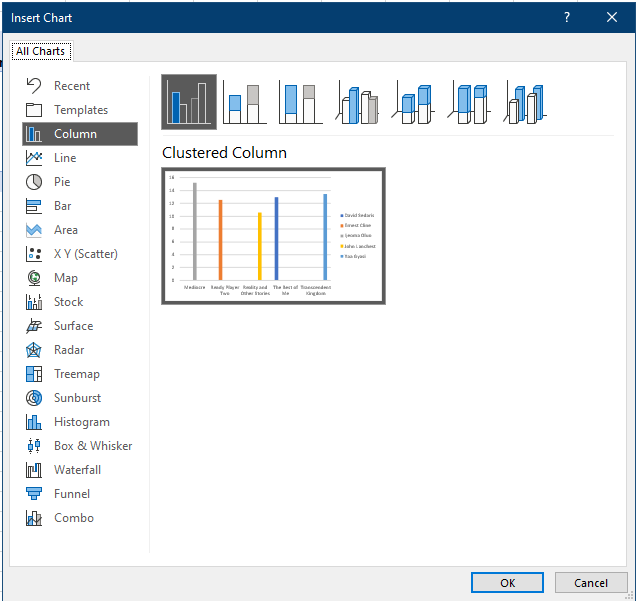
To make a chart using the data, once again Click on your PivotTable and then go to PivotTable Analyze and finally PivotChart. PivotChart will automatically tell you what tables are possible based on the data we have entered. We are going to select Column and Clustered Column for our table.
Press OK and there we have it, a nicely displayed table showing off all of our products and their prices based on the filter settings.
To progress further, try changing the filters or repeat the guide with your own set of data.
If you are as addicted to listening to music as I am, chances are you have used or still use Spotify. Spotify is a brilliant app but unfortunately, I could never get on with its UI.
Spicetify is a command-line interface that allows you to completely overhaul Spotify, from themes to even new features I was blown away by how stunning Spotify can look, one thing for sure is on any new PC I’m definitely downloading Spicetify.
How to install Spicetify
First things first you need to make sure you are running the Spotify desktop app and not the windows store version. Then you can install Spicetify easily using PowerShell.
This will install Spicetify onto your system from its master branch on GitHub. Optionally, if you also want access to Spicetify’s marketplace run this command.
Now Spicetify is installed we can move onto the setup stage.
Type the following into PowerShell
spicetify
This makes Spicetify find your Spotify install and generates the config file.
spicetify backup apply enable-devtool
This applies the default theme and also enables dev tools for you.
If all you wanted was to install Spicetify, congrats you have finished, enjoy your new Spotify client.
My Favorites
If you installed Spicetify marketplace then you will now notice on the Spotify client there is a new button, this is the marketplace, it allows the installation of tons of themes and extensions from a single click.
Marketplace Icon
Here are some of my favorites.
Themes
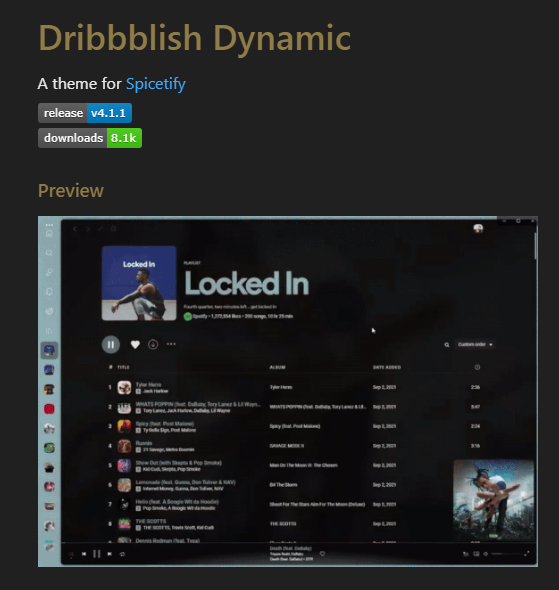
Dribbblish Dynamic
Dribbblish Dynamic
This theme is my personal favorite and the one I currently use, it overhauls almost all areas of Spotify, providing crisp colour changes on each new song, rounded edges, folder, and playlist icons, it really has it all. You can view its GitHub page here.
Extensions
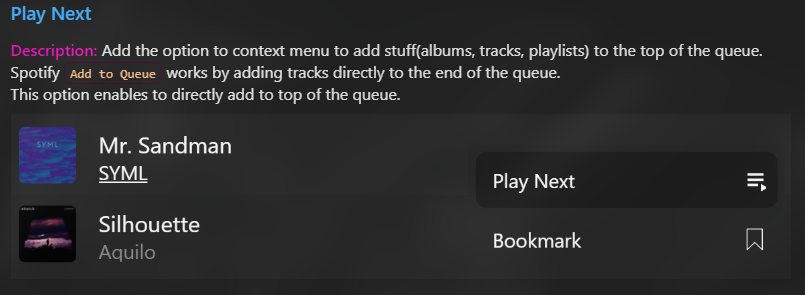
Play Next
Play Next is an extension that provides a feature that really should have been in Spotify from the beginning, it allows you to directly add a song to the top of your play queue, nothing more to be said, it’s brilliant. You can view its GitHub here.
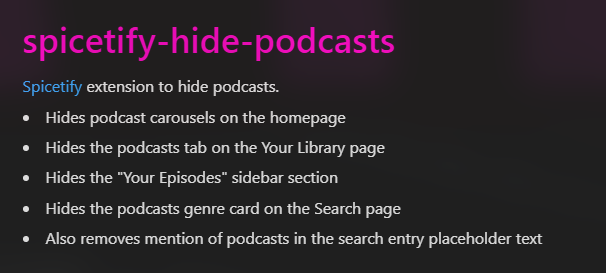
Hide Podcasts
If like me you use other apps for your podcasts, or you simply don’t want to see them on Spotify this is the extension for you. It removes all traces of Podcasts on Spotify, so much that you’ll forget that they were ever offered. View its GitHub page here.
Summary
Overall this was but a glimpse into what is offered by Spicetify but I hope I’ve shown you enough to convince you. Give it a try and get customising, who knows maybe you could even publish your own theme or extension.
The Raspberry Pi is taking the world by storm at the moment, their cheap prices but high performance are making them ideal for many applications, from simple webservers to home automation powerhouses.
Although relatively weak on their own in comparison to an actual desktop pc, you can easily increase the power by creating a cluster. Clustering allows for increases in task performance as the machine then works with others to get the task completed.
In this tutorial, we will set up a Kubernetes cluster on an Ubuntu server and utilize the optimized microk8s platform to get our system up and running smoothly.
Equipment – Required
At least two Raspberry Pi (it is preferable one has at least 4GB of ram but in my case, I used two 2GB models)
An internet connection
A nearby computer connected to the network
The IP address of your router
At least 2 micro-SD cards (One card per device you are connecting)
USB type C cable/cables (One for each device)
USB Charging socket (Aim for a supply capable of providing 15 Watts per Raspberry Pi)
Equipment – Optional
I am choosing to run my device headless, if you are not please see the below list for additional equipment you may need.
A HDMI monitor
A micro-HDMI to HDMI cable (Pi 4 only, Pi 2/3 use regular HDMI)
A keyboard
Some additional optional equipment for either performance or aesthetics
Ethernet cable (For increase networking speed although you can use Wi-Fi)
A 5-port switch (Reduces the trailing of cables and for connecting the devices)
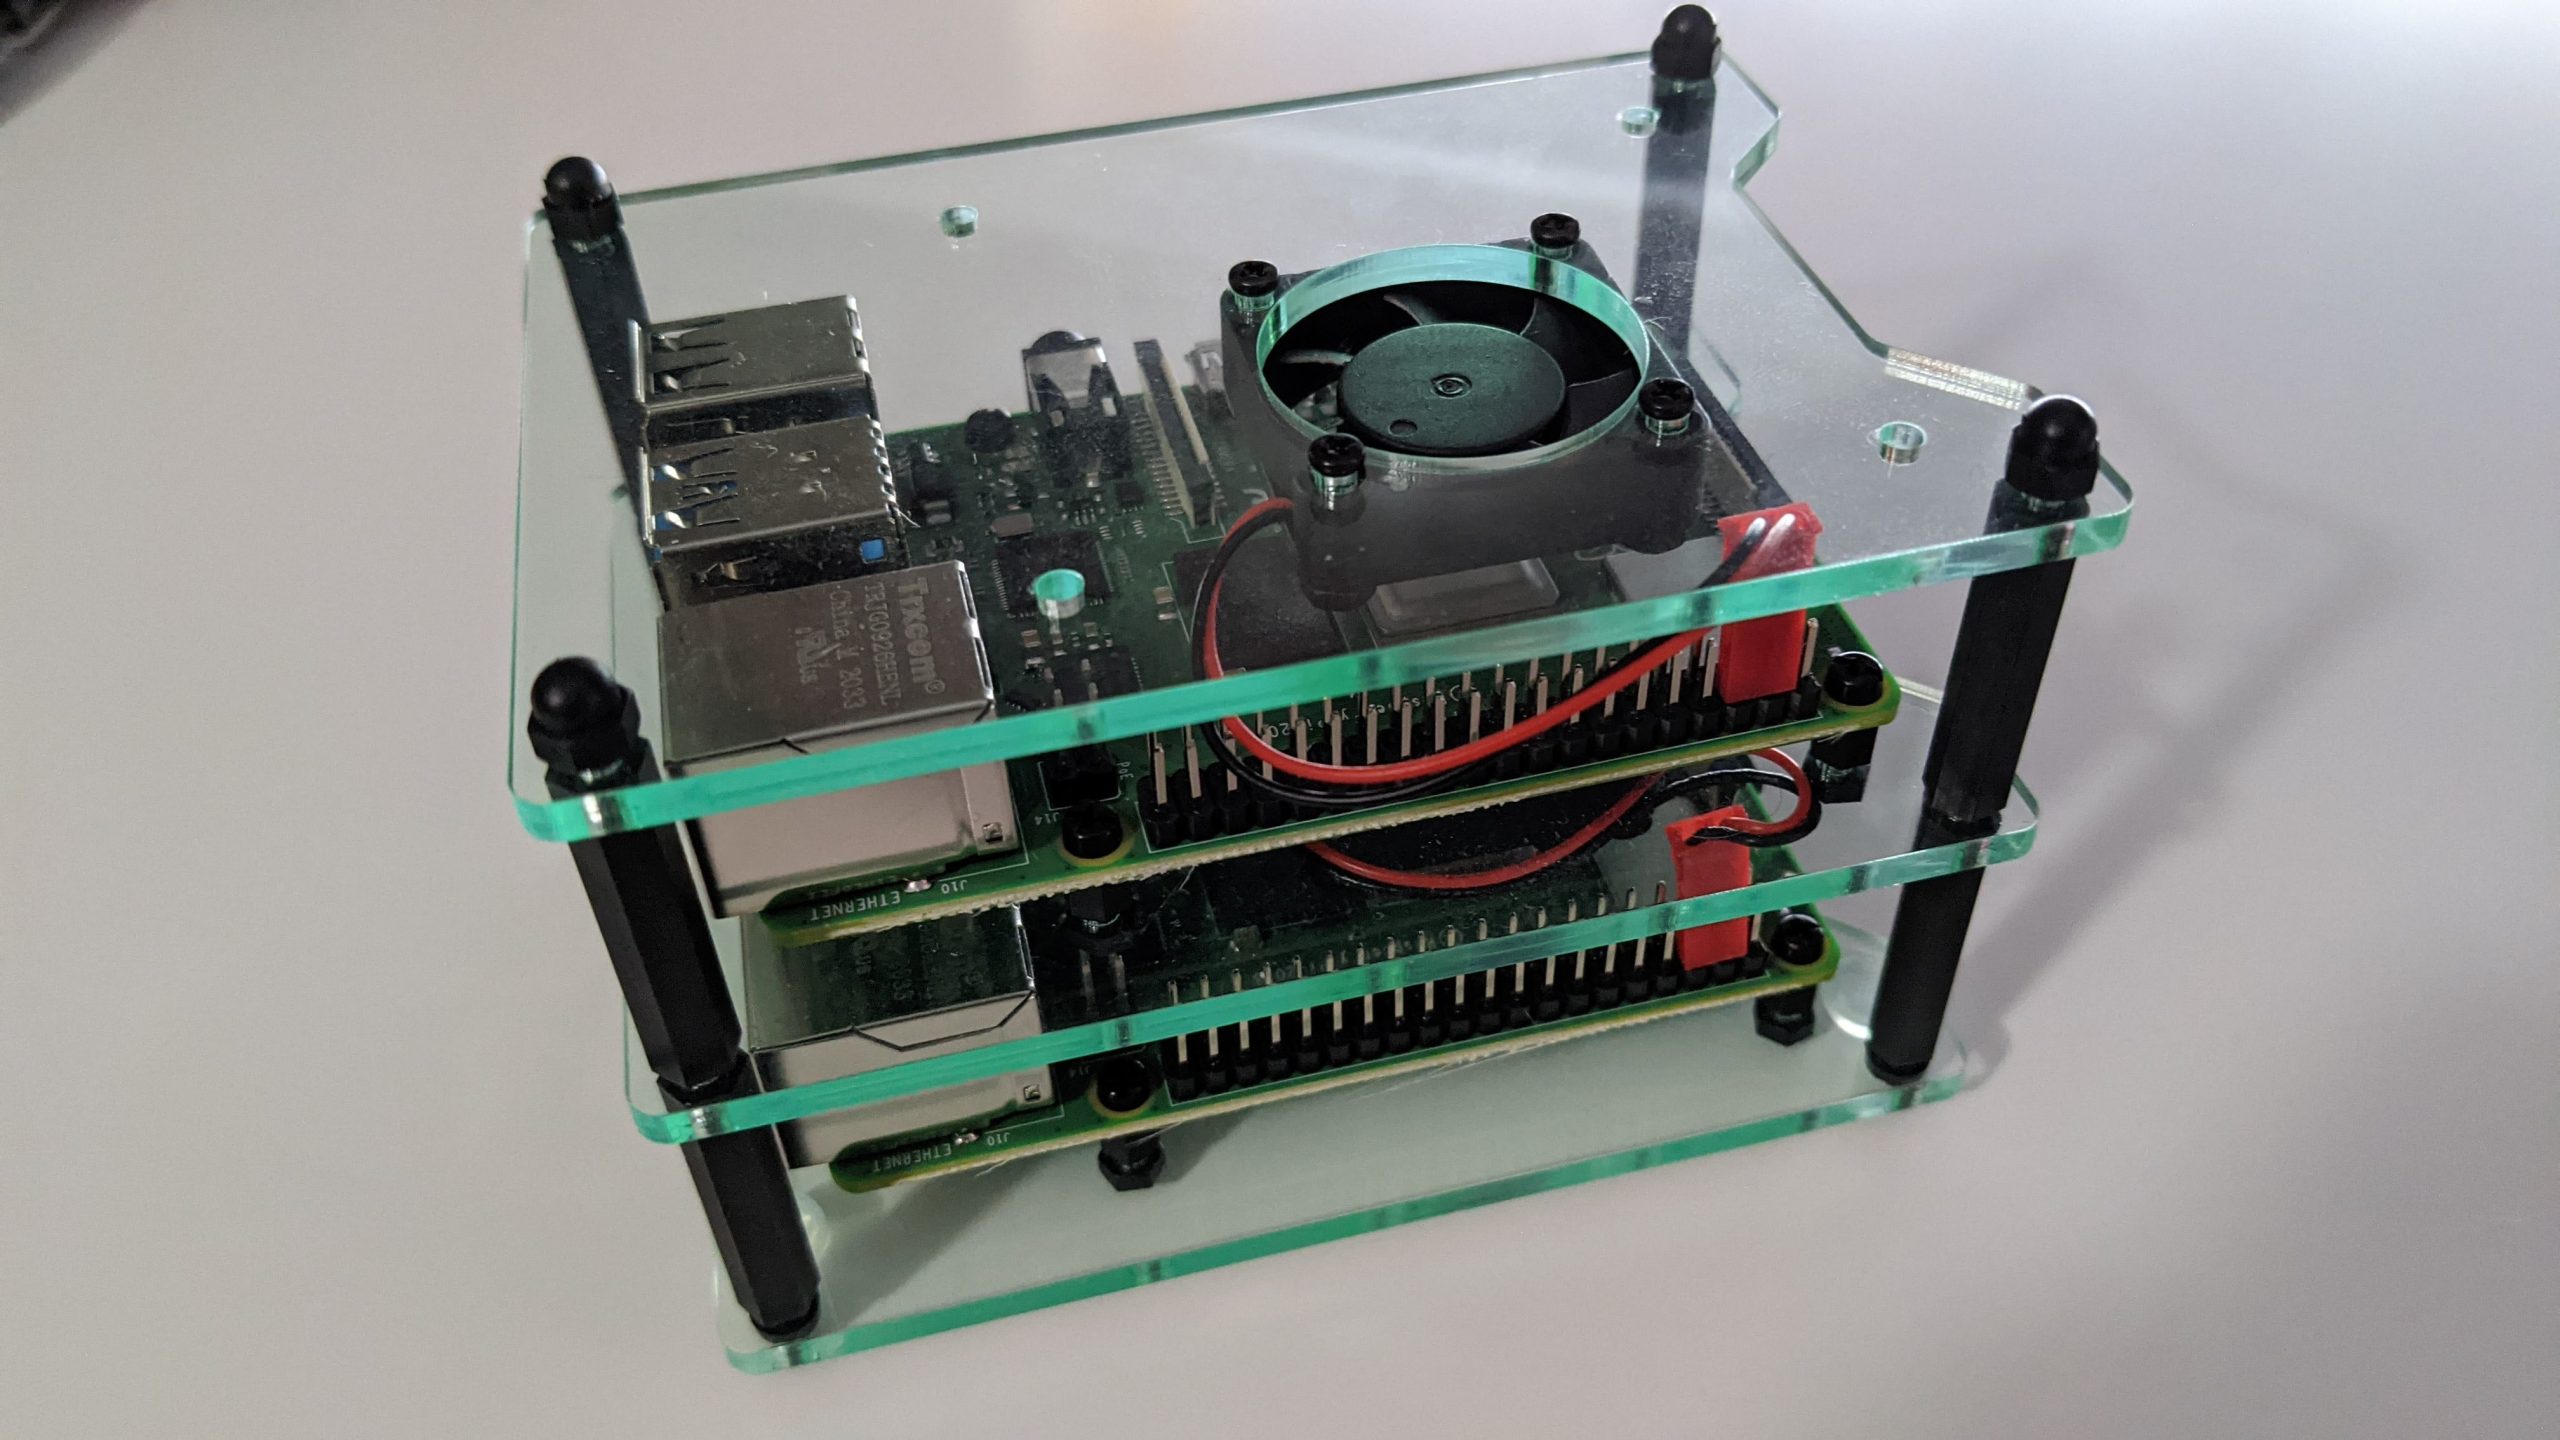
A cluster case to hold the Pis
Example of equipment
Making the cluster
Now with all your equipment, you can begin to assemble. If you did happen to buy a cluster case feel free to put your Pi’s inside, make sure not to lose any of the small parts.
The next step is to now download the ubuntu server image we will be using. You can find the iso at the link here. Please make sure to use the 64bit as it allows it to work with microk8s. Once it has been downloaded place your micro-SD cards into your computer and using Pi Imager flash the cards with the downloaded ubuntu image.
With both cards now flashed we are ready to place them into our devices. Connect your cables to the devices and you should see them both power up nicely.
Setting up the Raspberry Pi
These steps need to be done on both of your devices, so you can either repeat the steps are complete them on both devices at the same time. Giving the devices a few minutes for the first setup you should now be able to access them via ssh (if headless) or via keyboard and monitor.
Firstly, we need to find the new IP addresses of the two devices. We can do this easily by going to our router’s page via its IP address and browsing the client list. With the addresses now discovered, on your current device open an ssh client such as Putty and log in with the username and password of ubuntu (If this does not work straight away try again in a few minutes once the devices have finished setting up)
Now log into your devices we must now prepare the system for running microk8s. The first step is to enable c-groups.
This is done by modifying the file /boot/firmware/cmdline.txt using the command below
sudo nano /boot/firmware/cmdline.txt
Then go to the end of the current line and add the following.
cgroup_enable=memory cgroup_memory=1
Now saving and writing the file, we can move on to the next step.
With c-groups now enabled we need it to be running, for this to occur we just need to simply restart the device using:
sudo reboot
With the devices rebooted we can finally install microk8s onto them
sudo snap install microk8s –classic
This will automatically get the latest version of microk8s, if you need a particular version you can append –channel= to get that instead. For more documentation on this, see here For example:
With microk8s installed we are ready for setting up the cluster’s master and leaf nodes. I strongly recommend using the device with more ram as the master in the cluster, if they are both identical then you can choose either.
Creating the cluster
On the device, you chose as the master node, type the following command.
sudo microk8s.add-node
This will in turn generate a result that will allow you to connect the devices together, it should be similar to ip-address:port-number/token.
Now on your leaf node type microk8s.join and then the returned result
microk8s.join ip-address:port-number/token
Give the devices some time to establish the connection and soon enough type on the master the command of:
microk8s.kubectl get node
Get nodes output example
Should get all the nodes you have added to the master.
Should you wish to, you can also remove nodes using the expected command of:
microk8s remove-node “Name of Node”
My final tip to aid you in your use of microk8s is to set up a quick alias for kubectl, this will not affect anything but will make commands from here quicker for you.
sudo snap alias microk8s.kubectl kubectl
Disclaimer:
This tutorial is based on my experience of setting up, installing, and creating a microk8s cluster. All information provided was correct at the time of writing. In the event of changes, I will attempt to keep the tutorial updated. Please contact me here at [email protected] with the subject “Kubernetes cluster tutorial” if you find any errors or updates that need to be made.
If you want to convince your boss that you are working late or at night or active extremely early in the morning you might want to learn how to schedule your emails in Outlook.
Outlook is a powerful tool if mastered, today we are looking at email schedules and delays, this will allow you to write, send an email and have it arrive at its destination at a time or at your choosing.
Scheduling a single email
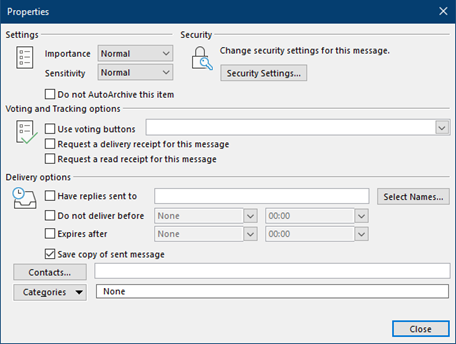
Setting this up is actually very easy, simply begin composing your email as normal and once finished instead of sending go to your ribbon and click on the small arrow in the tags section.
From here you should then see the following menu.
Now click the box Do not deliver before and select the date and time for the email to be sent.
Cancelling or changing a scheduled email
If you suddenly need to change the email and it has not been sent yet, then you are in luck.
Go to your Outbox and select the email you sent.
Now if you simply want to delete the email, you can go ahead and delete it. To change the email, open it up and append your changes. To change its delivery schedule, follow the steps above on setting the time and update the content box with your new desired delivery date.
Delaying all emails
If you wish to delay all the emails you send by up to 2 hours you can apply this very quickly.
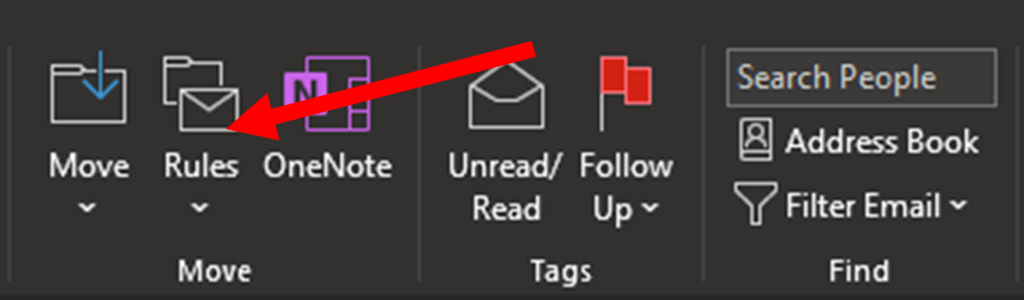
Start by clicking Rules and then Manage Rules and Alerts
From here next, select the email account you want to put the delay onto and then press New Rule.
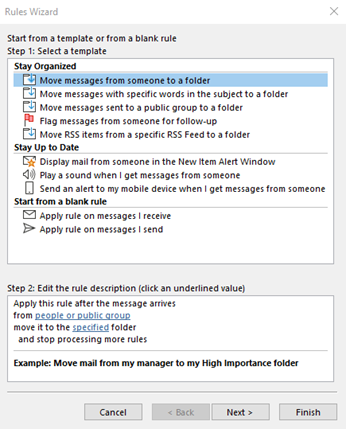
Select Apply rules on messages I send and press next.
If you want to you can configure conditions to trigger this rule, if not click Next.
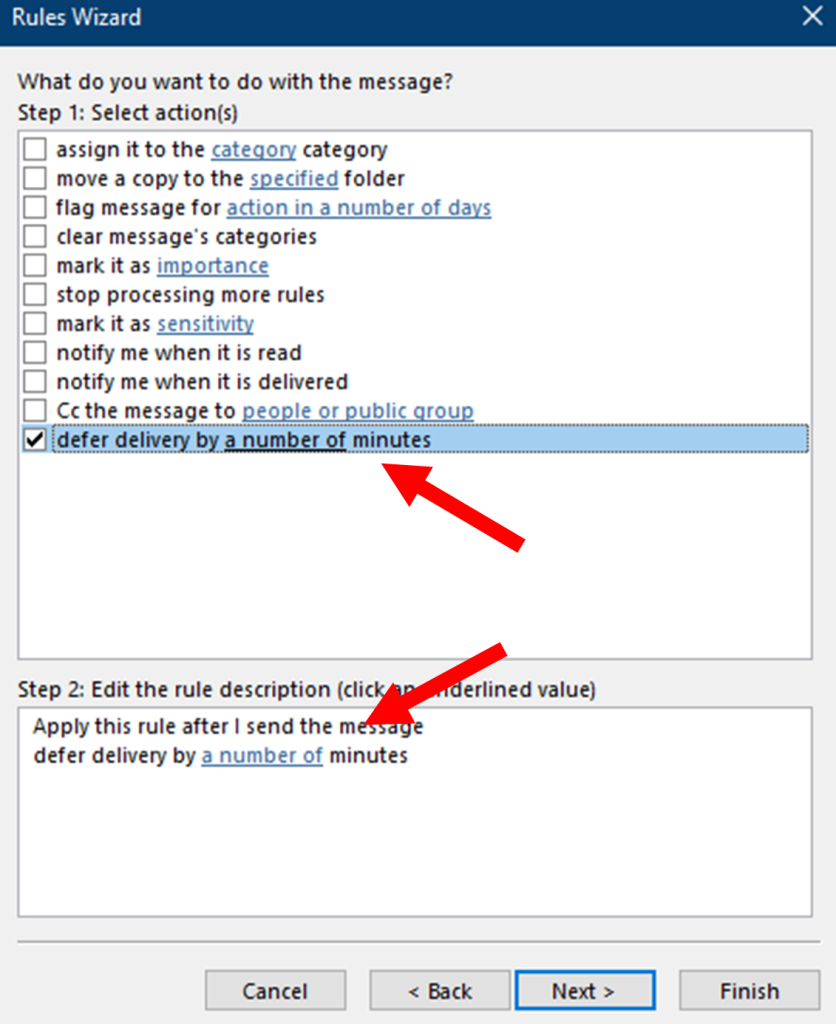
The last step is to defer delivery by a number of minutes, tick the box and click on the blue “a number of text” and input the amount of time you want to delay messages by.
If you do not want any more conditions, click finish.
Remember to cancel this delay, you can return to Manage rules and alerts and disable it from there.
We use cookies to ensure that we give you the best experience on our website. If you continue to use this site we will assume that you are happy with it.OkNo
You can revoke your consent any time using the Revoke consent button.Revoke consent